Whether you only needed to enter a handful of them or you were typing hundreds of consecutive values, you may have wondered if there was a better way to do it. Our tutorial below will show you a quick way to add sequential values to a cell range in Microsoft Excel.
How to Use the Fill Handle to Number Data Automatically in Excel
Our guide continues below with additional information on how to use the sequence number fill tool in Microsoft Excel, including pictures of these steps. It’s a common task in Microsoft Excel 2013 to fill a row or column with a series of consecutive numbers. But doing it manually can be tedious, and there’s always the possibility of a typo that could create problems in the future. That’s why it’s so nice that there is a way to generate consecutive numbers in Excel automatically. You may have explored different options like the row function, or simply typing your data into all the cells, but there is another way to generate a large number of sequential numbers in an Excel spreadsheet. You can automatically number rows in Excel by entering the first number of the sequence into a cell, selecting that cell, holding down Ctrl on your keyboard, then clicking and dragging the bottom-right corner of that cell until you have selected all of the cells that you want to fill with numbers from that sequence. Fortunately, Excel 2013 has a feature that will automatically fill rows or columns with a series of incrementally increasing numbers. Our tutorial below will show you two different ways to achieve this result. Do you want to start color coding cells in your spreadsheets? Then check out our background color Excel article to learn how.
How to Numbers Rows Automatically in Excel 2013 (Guide with Pictures)
The steps in this article will show you how to create a sequence of consecutive numbers in a row or column. There is more than one way to do this, so we will show you two different options and you can decide which solution is better for you.
Method 1 – Using the Ctrl Key on Your Keyboard
This is probably the most effective way to do this, as it is going to help you to create the series of numbers that you are looking for in almost any situation.
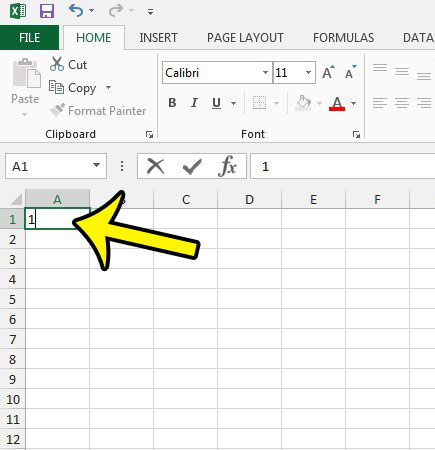
Step 1: Type the first number of your series into the first cell where you would like to enter the numbers.
I am starting with the number “1” and filling the first 10 rows of column A.
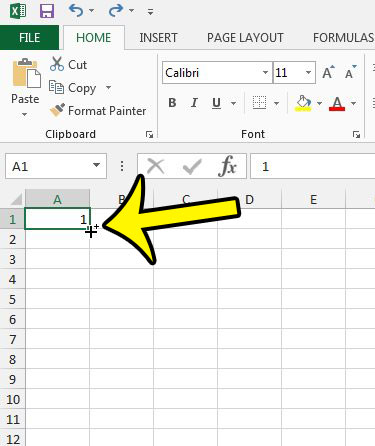
Step 2: Click the cell with the number to select it, hold down the Ctrl key on your keyboard, then click the bottom-right corner of the selected cell and drag it down or right until all of the cells in which you wish to add your numbers are selected.
You can then let go off the mouse button and Excel will automatically fill the cells with a series of consecutive numbers.
Method 2 – Enter the First Two Numbers of the Series
This method is a bit different from the last one, as this is going to require you to create a pattern with your data first before you can going to be able to automatically fill cells with consecutive numbers.
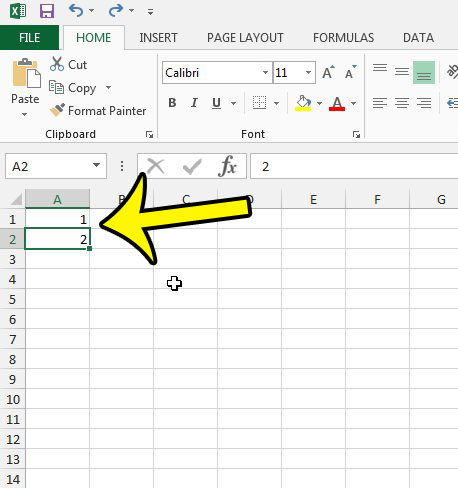
Step 1: Type the first number into a cell, then type the next number into the cell below it, or to the right of it.
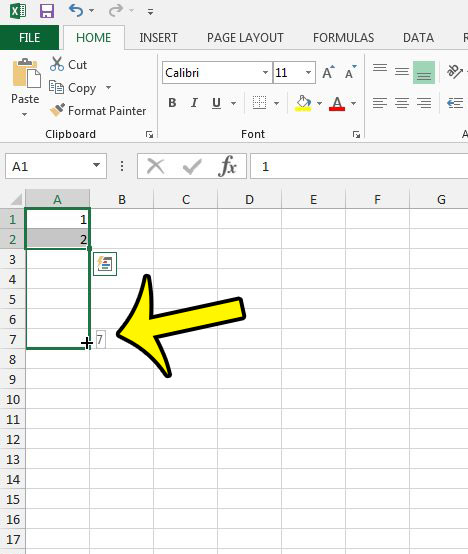
Step 2: Select both of the cells, then click the bottom-right right corner of the selection and drag it down or right until all of the desired cells are selected.
You can then let go of the mouse button to fill the cells with consecutive numbers. Our tutorial continues below with additional discussion about using the autofill feature in Microsoft Excel as an effective yet simple way to generate consecutive numbers in Excel.
More Information on How to Auto Number a Row or a Column in Excel
While the steps in our guide above have focused specifically on what to do when you need to fill in a large range of rows with consecutive numbers, you might be wondering if there is a way to number columns instead. Fortunately, you can use this same method if you need to fill in a horizontal row or numbers rather than a vertical row. You just need to drag the handle to the right instead of down while you are holding the Ctrl key on your keyboard. If the cell that you are working with has a formula in it, then the sequence function described above is going to use the same formula in each of the blank rows that you select, but it will adjust the formula accordingly based on the cell where the copy of the formula is now located. Is there only a part of your worksheet that is printing in Excel 2013? Learn how to clear a print area in Excel 2013 to see if that helps to fix your printing issue.
He specializes in writing content about iPhones, Android devices, Microsoft Office, and many other popular applications and devices. Read his full bio here.


