You can often make a large improvement to text appearance by simply using a different font. You can change the font in Photoshop by clicking inside the text layer, selecting everything, then clicking the Font dropdown menu at the top of the window and choosing a new font. Photoshop CS5 has so many different tools and utilities to edit your images that it can be very easy to overlook some of the more basic ones. The ability to change the appearance of characters is found in most programs, so we have come to take it for granted. The filter and layer styling options are far more interesting than the font options, and you might forget how effective a font change can be. But you can change your text font in Photoshop CS5 at any time (provided that you have not rasterized the text layer) and gain a whole new look for your image. If you don’t like the selection of fonts available to you in Photoshop CS5, you can read here to learn how to add more fonts to Photoshop.
How to Change Text Font in Adobe Photoshop CS5
Our guide continues below with additional information on choosing a new font for a text layer in Photoshop, including pictures of these steps.
How to Edit Text Font in Photoshop (Guide with Pictures)
If you are new to Photoshop, or if you typically only use it for a few specific purposes, then you may not be aware of all the different windows and panels that you can display. Each window focuses on a specific task or image element and offers quick access to the most useful toolset for completing that task. This applies to editing text as well, and the tools for performing those edits can be found on the Character panel. We will provide some examples of what you can do to your text with these tools below.
Step 1: Begin by opening your image in Photoshop that contains the text layer whose font you want to change.
Step 2: Click Window at the top of the Photoshop window, then click the Character option.
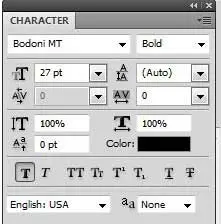
This will display a panel that looks like the image below. Note that you can skip this step if the Character window is already open.
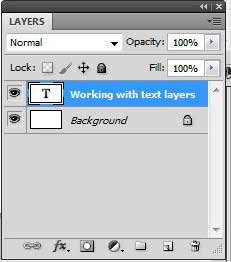
Step 3: Press the F7 key on your keyboard to display the Layers panel (if it is not already being displayed), then click the text layer that you want to edit.
As with the Character window you can skip this step if the Layers panel is already visible.
Step 4: Click the Text tool from the toolbar on the left side of the window.
It’s the tool that looks like a T.
Step 5: Click anywhere inside your text, then press Ctrl + A to select all of the text.
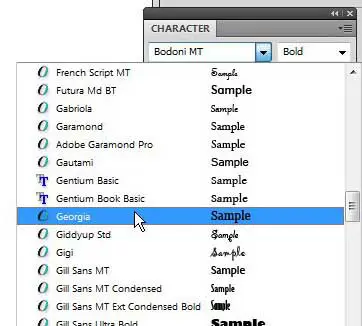
Step 6: Click the Font drop-down menu on the Character panel, then choose the font you want to use instead of the current option.
Your text will switch to that font. Note that some fonts are much larger or smaller than other fonts, so you may also need to adjust the pt size after making this change. Our tutorial continues below with additional discussion about switching fonts for a text layer in Adobe Photoshop.
More Information on Switching Fonts in a Photoshop Image
While you have all of your text on this layer highlighted, you can use the other tools on the Character panel to make some universal changes, if you would like. For example, there are options to adjust the space between characters, the text size, and the text color. If you want to change text color in Photoshop you simply need to select the text that you want to modify, then click the color swatch and choose a different color. You can also use the icons at the bottom of the panel to underline your text, add a faux-bold style, or convert all of the text to upper or lower case. Experiment with the different icons and drop-down menus to see the options available to you. You can always undo your last action by pressing Ctrl + Z on your keyboard. The fonts in Photoshop CC are the ones that are available on your computer. If you need different fonts than the ones that you can currently access then you need to add them to your computer. This will make them available for every application on your computer rather than just Photoshop. If you don’t have the font that you want to use then you will need to find it and download it, then install it on your computer. In Windows you simply need to extract the downloaded font files in the zip file format, then right-click on the font file and choose the Install option. You can find a lot of downloadable fonts on the Google Fonts site here.
Additional Sources
After receiving his Bachelor’s and Master’s degrees in Computer Science he spent several years working in IT management for small businesses. However, he now works full time writing content online and creating websites. His main writing topics include iPhones, Microsoft Office, Google Apps, Android, and Photoshop, but he has also written about many other tech topics as well. Read his full bio here.
You may opt out at any time. Read our Privacy Policy


