Unfortunately your spreadsheet may have been designed in such a way that this could be confusing to someone that reads your data. And while you could manually rearrange your pages to the appropriate order, that might be difficult if you are printing a lot of copies of your data. Fortunately you can adjust the print order for the pages of your spreadsheet so that it prints over, then down. Our tutorial below will show you how to make this change.
How to Switch to the “Over, then down” Page Order in Excel 2013
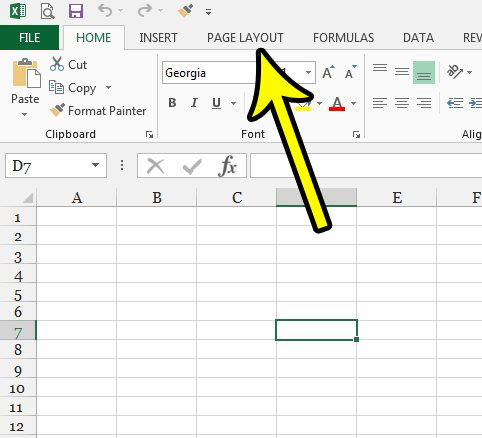
The steps in this article were performed in Microsoft Excel 2013. This is going to change the order in which Excel prints the pages of a multi-page spreadsheet. Step 1: Open your spreadsheet in Excel 2013. Step 2: Click the Page Layout tab at the top of the window.
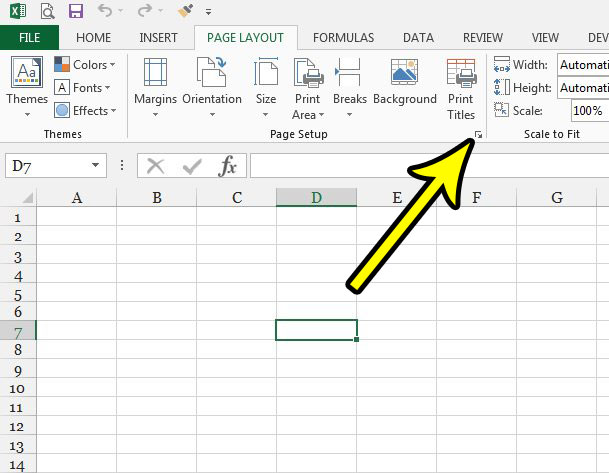
Step 3: Click the small Page Setup button at the bottom-right corner of the Page Setup section of the ribbon.
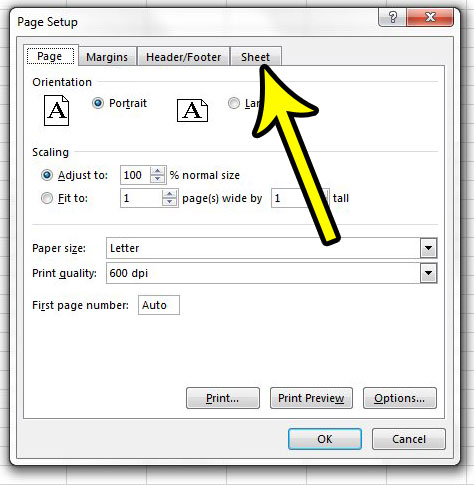
Step 4: Click the Sheet tab at the top of the window.
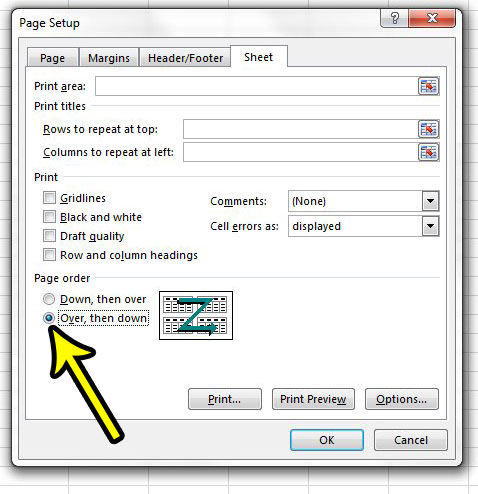
Step 5: Select the Over, then down option under Page order, then click the OK button to apply the change.
Are there other things about your printed spreadsheet that you would like to change, or are you having trouble making something happen when you print? Read our Excel guide to print optimization for some tips that can make printing a little easier. He specializes in writing content about iPhones, Android devices, Microsoft Office, and many other popular applications and devices. Read his full bio here.