But until recently, there hasn’t been an easy way to customize the font for your messages in the Mail app. If you wanted to change the font style, you needed to change it each time you sent an email out. But a recently added new feature aptly named “Default Font” allows you to change the font style, size, and color for all your accounts.
Change Default Font in Windows 10 Mail App
The first thing to note is that to create a custom default font; you need to be running version 16005.11231.20142.0 of the Mail app or above. To find the version you’re running, go to Settings > About.
Launch the Mail app and open Settings (gear icon at the bottom of the left pane) to get started. Then choose “Default Font” from the list of options in the Settings menu.
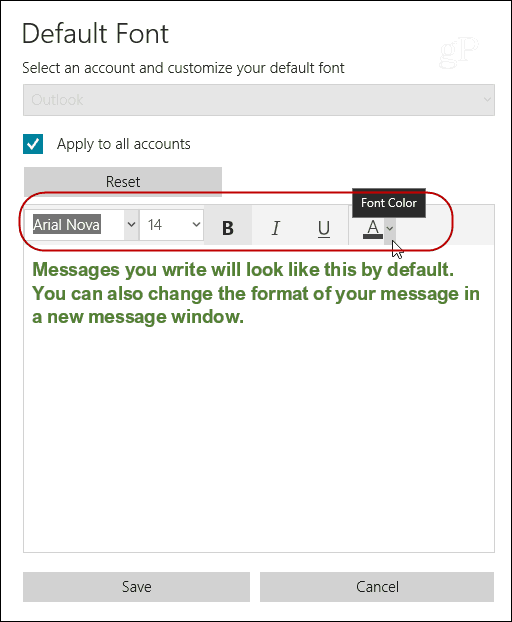
The Default Font screen will open, and here is where you can set your own default font. You can choose a different font style, size, and color from the font tools bar. While making the changes, you will preview how the text will look in the preview box.
You can set the default font for a specific account or apply it to all accounts if you have multiple email accounts. In fact, you can set a different default font style for each account if you want. Once you have your new font select, make sure to hit the “Save” button. Now, it’s worth noting that the Mail app shipping with Windows 10 1903 is getting a revamp. It’s not a complete overhaul, but it does have some nice improvements to the interface and overall user experience. But even with those improvements, you can still set a different default font app for your messages following the steps shown above.
![]()


