That much is obvious. But how does Windows 10 treat public networks and private networks differently? And how do you switch from one to the other? That’s precisely what we’ll be covering in this article.
Set Your Network Profile in Windows 10 to Private or Public
When you first connect to a network, Windows will ask you what kind of network and what settings you want to use. If you don’t remember doing this or change your mind about creating a network, you can switch it.
How to Change a Wireless Network to Private or Public
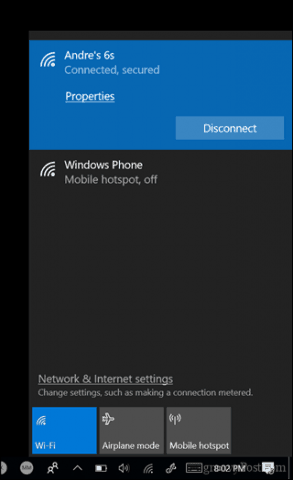
To change from a public network to a private network for vice versa, start by connecting to your network. You can do this by opening the available Network icon in the Notification area. Select the network, then connect to it. After connecting, select it, then click Properties. On a “private” network, Windows 10 assumes that you are on a trusted network that only you and your family members have access to. Your device will be discoverable on the network (others can see it). If you are using Homegroups, you’ll be able to share printers and files with other computers on the network. Public and private networks also have different firewall settings. By default, both public and private networks have pretty restrictive firewall settings. But you can customize your firewall settings to be different depending on what type of connection you’re on.
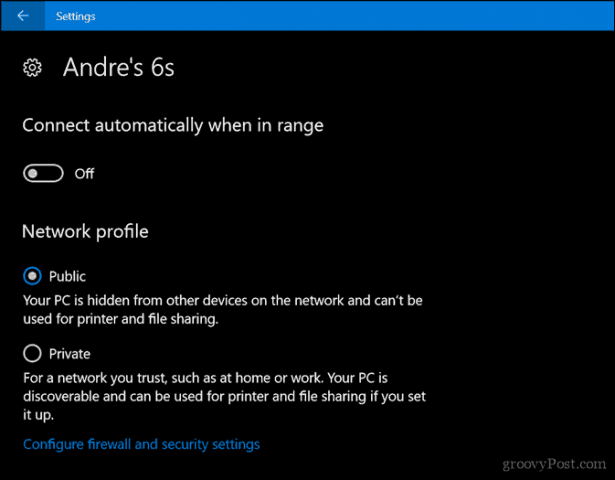
Here you can change your Network profile to Public or Private. Choose the one that best suits your environment.
How to Change a Wired Network to Public or Private
If you want to change the network profile for a wired network, open Start > Settings > Network & Internet > Ethernet, then click your network adapter.
Then choose the profile you want.
Customize Public and Private Network Settings
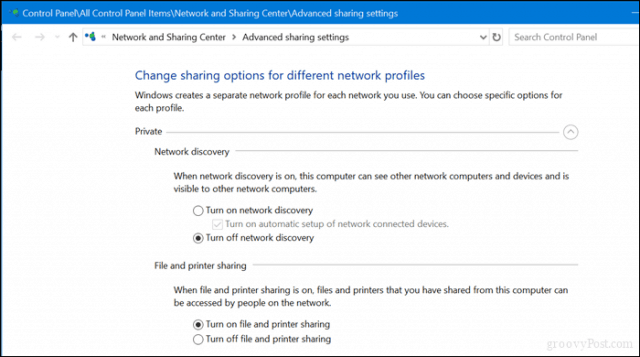
You can change the settings for your public or private networks. For example, if you wanted to make your computer discoverable on public networks (not recommended) or disable file or printer sharing on a private network, you could. Open Start > Settings > Network & Internet, under Change your network settings, click Sharing options.
Expand Private or public, then choose the radio box for the desired options such as turning off network discovery, file and printer sharing, or accessing homegroup connections.
There you have it, easy ways to protect or give access to your networks. If you want to learn more about managing networks in Windows 10, check out our other articles, How to Create and Join a HomeGroup in Windows 10 and Connect Windows 10 to Wired, Wireless, and P2P Networks. Users working with a mix of Macs and Windows can find help in our guide How to Network Windows 10 and OS X and Share Files. Any suggestions??????? Click on the Network and Internet icon. As you are using a wired connection, click on Ethernet. Click on the connection name on the right. In my case, it is named just “Network”. Turn on the desired option Comment Name * Email *
Δ Save my name and email and send me emails as new comments are made to this post.


![]()
