You might be aware of programs like Adobe Photoshop that allow you to create and edit pictures in a lot of exciting ways, but advanced image editing software might not be something you want to buy if you only need to crop a few of your pictures. The ability to crop a picture in Microsoft Word not only makes the process a little simpler, it allows you to do it without leaving the application. Fortunately the presence of this cropping utility in Word lets you perform some minor editing on the pictures in your documents, it’s easy to use, and you don’t even need to worry about modifying the original version of your image, as the picture in the document is simply a copy of the original one on your computer.
How to Crop a Picture in Microsoft Word – Quick Summary
If you need additional help, these same steps can be found below with images, as well as some additional information.
Cropping a Picture in a Word 2013 Document
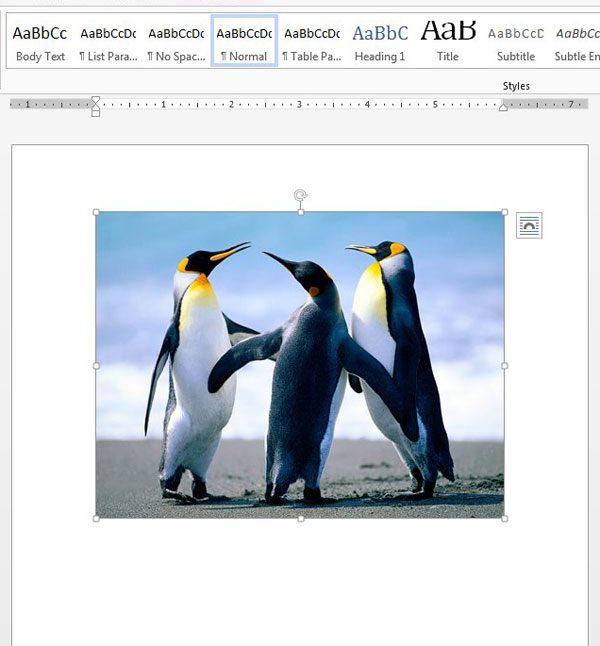
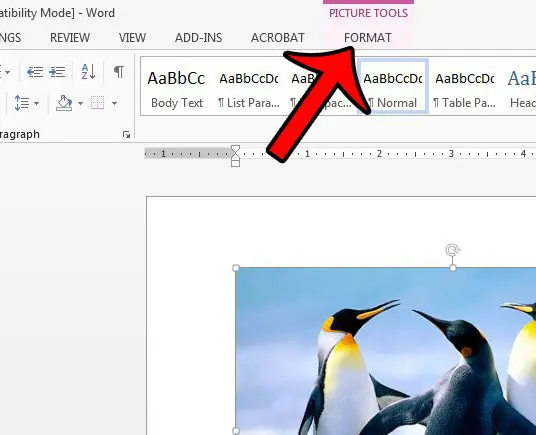
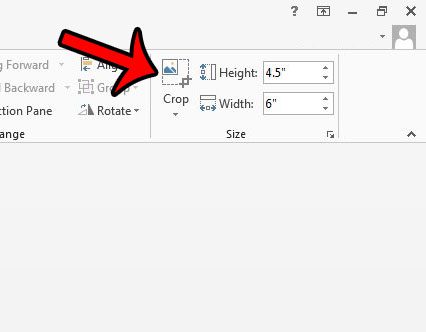
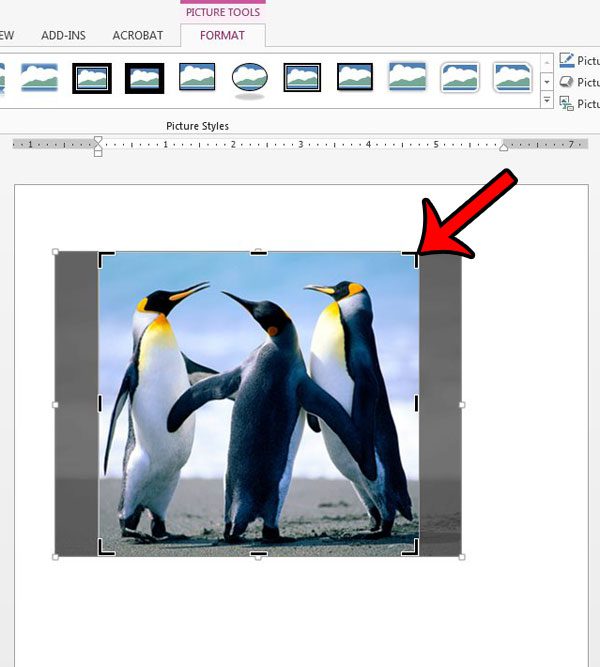
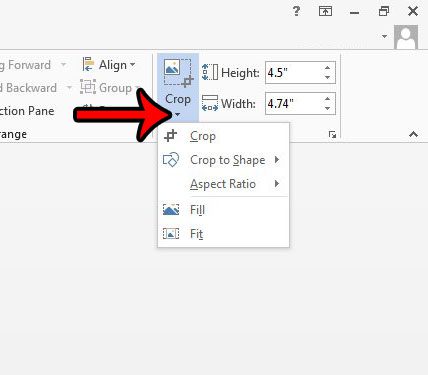
The steps in this article will assume that you have a picture in a Word document that you would like to crop directly from within Word 2013. Once you have the picture cropped, you can do additional things to it, like add a link to a Web page. Step 1: Open the document. Step 2: Click the picture to select it. Step 3: Click the Format tab under Picture Tools at the top of the window. Step 4: Click the Crop button in the Size section at the right side of the ribbon. Step 5: Drag the black borders around the image until they are around the part of the image that you wish to keep. You can then press Enter on your keyboard, or click the Crop button again, to apply the crop to the picture. If you wish to crop your picture in another way, such as if you want to crop it to a specific shape, then click the down arrow under the Crop button instead. This will provide you with some additional cropping utilities, as shown in the picture below. While you will only see the portion of the image that you want to see in the document, Word actually stores a bit of data about the actions you have performed on your images. This enables you to reset the image to its original state, for example, if you decide later that you don’t like your edits and would prefer to start over. You can reset your picture with the following steps. Step 1: Select the picture. Step 2: Click the Picture Tools Format tab at the top of the window. Step 3: Click the little arrow to the right of Reset Picture, then choose the Reset Picture & Size option. Do you want people to be able to click your picture and open a file or Web page? Learn how to add a link to a picture in Word 2013. After receiving his Bachelor’s and Master’s degrees in Computer Science he spent several years working in IT management for small businesses. However, he now works full time writing content online and creating websites. His main writing topics include iPhones, Microsoft Office, Google Apps, Android, and Photoshop, but he has also written about many other tech topics as well. Read his full bio here.
You may opt out at any time. Read our Privacy Policy