Custom DNS Kindle Fire HDX
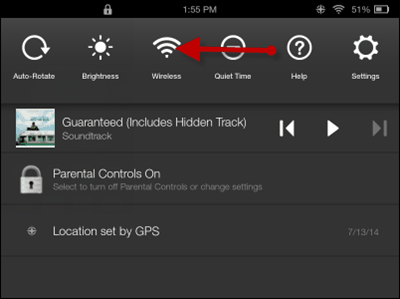
From the Kindle Fire Options Menu, Click on the Wireless icon.
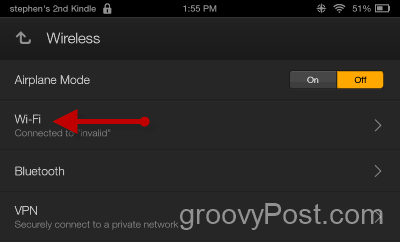
On the next screen tap on Wi-Fi.
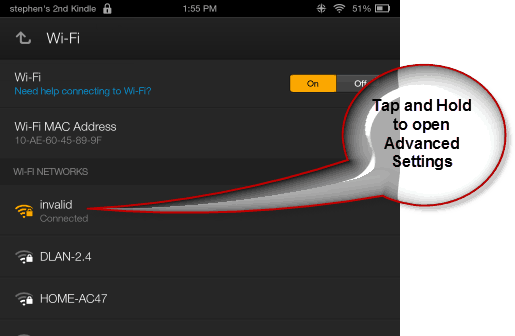
Tap and Hold your Wi-Fi network to open the Advanced Wi-Fi settings.
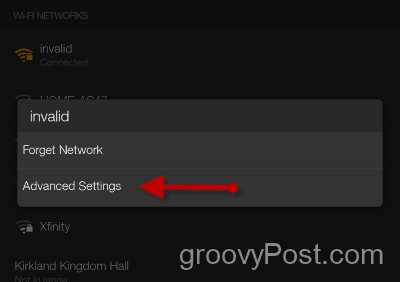
Then tap Advanced Settings.
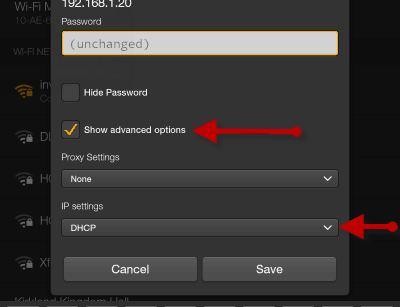
Now check the box “Show Advanced Settings.” Tap the IP Settings drop-down and change DHCP to Static.
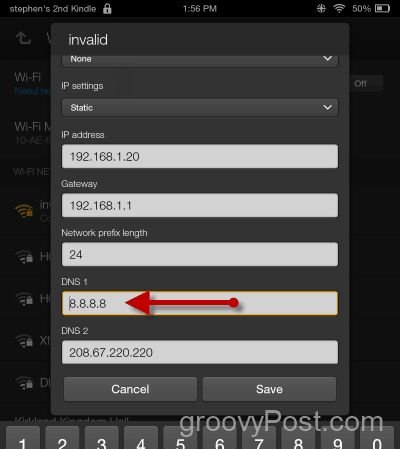
With IP settings set to Static, scroll down and change both entries to 8.8.8.8 and 8.8.4.4 which is Google’s Public DNS. Or, you can use another DNS service you prefer, such as OpenDNS or Cloudflare DNS.
At least with my Kindle Fire HDX, it kept the DHCP assigned IP address and Gateway provided by my Wireless Routers DHCP scope. If you want to be extra thorough, you might also want to change your IP address to a higher IP in the range just to make sure it doesn’t step on another device on your network at a later time. Comment Name * Email *
Δ Save my name and email and send me emails as new comments are made to this post.


![]()
