Our tutorial below will show you how to use the Delay Delivery feature in Outlook so that you can schedule an email to be sent at a time and date that you specify. Once you have configured the email with those options, Outlook 2016 simply needs to be open and running on your computer at that time, and the message will be sent.
How to Send an Email at a Scheduled Time With Outlook 2016
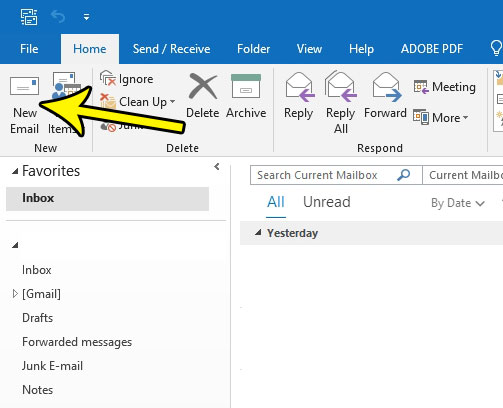
The steps in this article were performed in Microsoft Outlook 2016, but will also work in other version of Microsoft Outlook as well. Note that, in order for this to work, Outlook will need to be open and running on your computer at the time when you want the scheduled email to be sent. The email will remain in your Outbox until the time that you have scheduled it to be sent. Step 1: Open Outlook 2016. Step 2: Click the New Email button at the top-left of the window to create a new email.
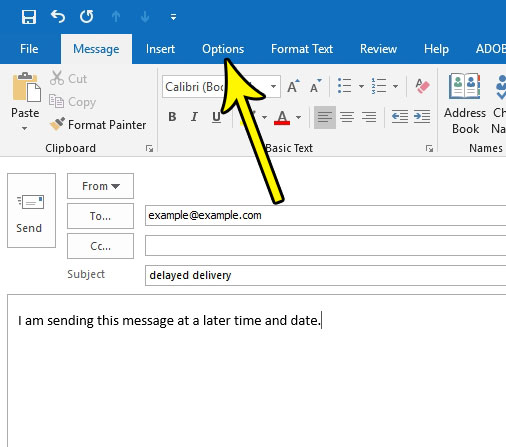
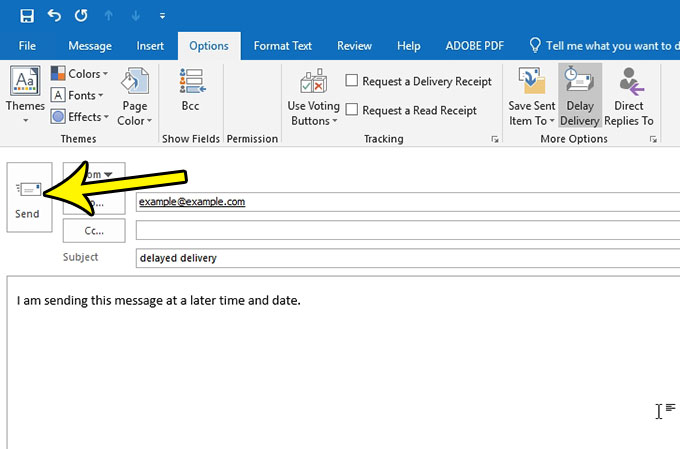
Step 3: Enter the sender’s address, the subject, and the body of the email message for which you would like to delay delivery, then click the Options tab at the top of the window.
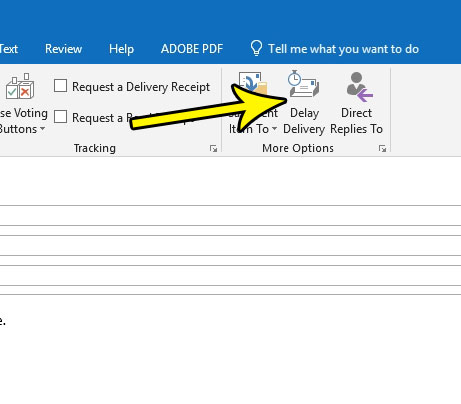
Step 4: Click the Delay Delivery button in the More Options section of the ribbon.
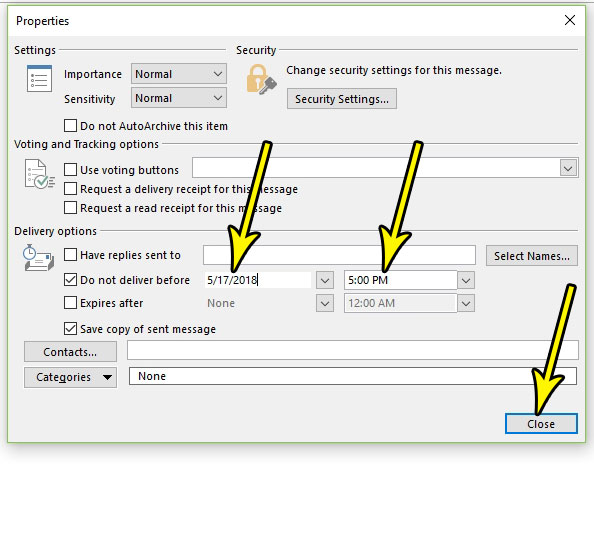
Step 5: Adjust the time and date to the right of the Do not deliver before line of the window, then click the Close button.
Step 6: Click the Send button when you are ready to complete the message and send it to the Outbox to be delivered at the time and date you specified. As mentioned earlier. note that Outlook will need to be open and running at that time for the message to be sent. Otherwise it will only be sent when you open Outlook after the scheduled time.
Does it seem like Outlook isn’t checking for emails as often as you would like? Find out how to change the send and receive settings in Outlook and have it check your email server for new messages more frequently. He specializes in writing content about iPhones, Android devices, Microsoft Office, and many other popular applications and devices. Read his full bio here.
