Additionally, if you have team members who could not attend the meeting, you can share the recording with them so they’re in the loop. And to be sure the recording is only accessed by those you select, you can manage access to it. Let’s walk through your options for downloading, sharing, and managing access to your Microsoft Teams recordings.
Download a Teams Recording
You can download a recording from the Microsoft Teams app or online.
Files Section of the App
If you have the Microsoft Teams desktop app open, you can download the recording easily.
Channel or Chat in the App
Maybe you have the channel or chat open in the app and see the recording in the conversation history. If you click it, the recording will open in your browser. At the top of the screen, click Download. Then go to your downloads folder to obtain the file.
SharePoint Online
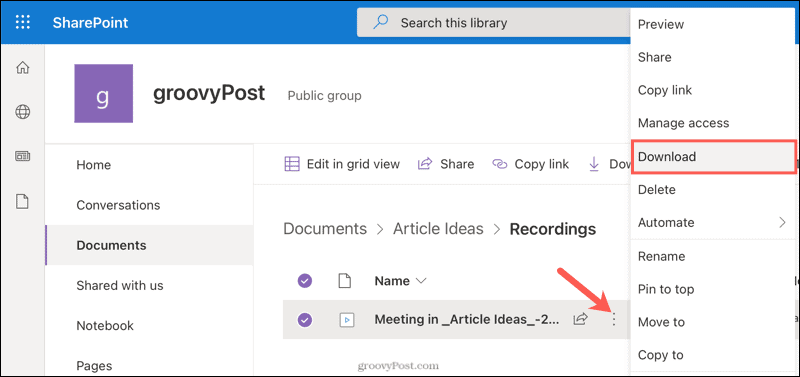
One more spot you can download the recording from is the SharePoint website (or OneDrive per your company’s preference). Similar to the Files section of the Teams desktop app, navigate to the Recordings folder. Hover your cursor over the More Actions button and choose Download.
Share a Teams Recording
You have a couple of ways to share a Teams recording. You can copy a link to it and then share it where you please, or you send an email with the link to those you want to share it with.
Copy a Link
Visit one of these locations to grab a copy of the link to the recording:
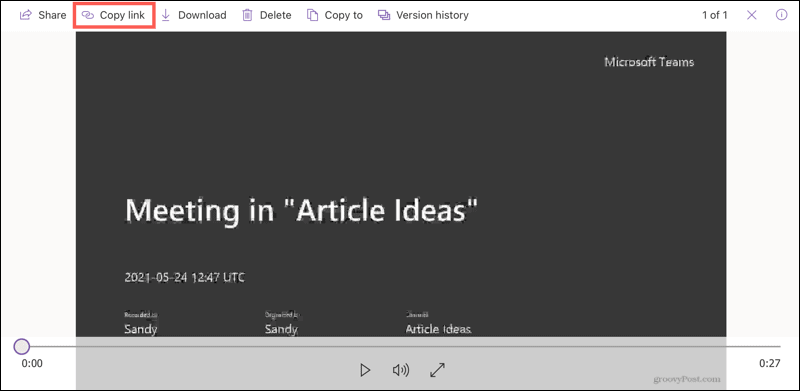
Teams app: Go to Files > Cloud storage > Recordings. Click More Actions for the recording and pick Copy Link.Channel or chat: Find the recording in the conversation, click More Options (three dots) on the top right of it, and choose Get Link.Recording online: If you clicked the recording in a channel or chat to listen online, click the Copy link option at the top of the screen.SharePoint online: Navigate to the Recordings folder, click the More Actions button, and choose Copy Link. Alternatively, select the recording and click Copy Link at the top. (You may also have similar options in OneDrive online.)
Share a Link Via Email
You can share the recording by entering the email addresses of your recipients in one of these spots:
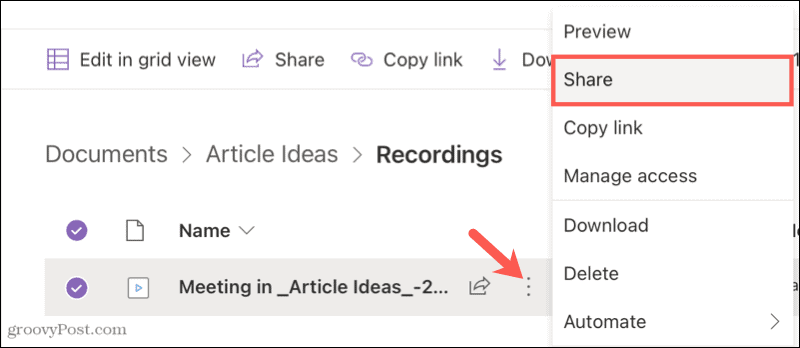
Recording online: If you clicked the recording in a channel or chat to listen online, click the Share option at the top.SharePoint online: Navigate to the Recordings folder, click the More Actions button, and choose Share. Alternatively, select the recording and click Share at the top. (You may also have similar options in OneDrive online.)
Enter the name, email address, or group and optionally a message. Before you hit Send, you can adjust the link access. Choose who can access the link, if you want to let them edit, and whether you want to block them from downloading the recording.
Click Apply after making any changes to access and then Send to complete the process and send the email(s).
Manage Access to a Recording
You can manage and adjust access to a Teams recording before or after you share it and even if you haven’t share it yet using the instructions above. Access the recording in SharePoint online, click More Actions, and choose Manage Access. A sidebar will open on the right side where you can perform a variety of actions.
Stop sharing by clicking this option at the top.Start sharing by clicking Share.Grant direct access by clicking the plus sign.Adjust access by clicking the drop-down box next to a user or group.View additional permissions and access for the team by clicking Advanced.
Download or Share a Microsoft Teams Recording
It can be easy to miss things in a meeting, especially if there are many attendees. But with options to download and save a Teams recording, you can play it to see what you missed. And if you want to be sure absent members are up to date, share it! For more on using Microsoft Teams, look at how to set up a meeting or share your screen in Teams. Comment Name * Email *
Δ Save my name and email and send me emails as new comments are made to this post.
![]()


