Excel spreadsheets typically don’t print the way that you want them to. Occasionally you will get lucky and the number of rows or columns in your spreadsheet will match up perfectly with the dimensions of your printed page, but more often than not, you will have one column or one row that adds another page, or even doubles the number of pages. One way around this is to force Excel 2013 to fit your entire worksheet on one page. Our guide below will show you three different ways that you can accomplish this. if you aren’t concerned with printing and want to see all of the data in your sheet, then learning how to expand all rows in Excel can greatly improve the usability of a worksheet. Find out how to autofit all columns in Excel if you would like to be able to see all of the data that is contained within the cells in your spreadsheet.
3 Methods – Fitting an Entire Worksheet on One Printed Page in Excel 2013
There are three different ways that you can fit a spreadsheet to one page in Excel 2013. We will show you each of those methods below. Each method is presented first as just the steps, then it is repeated with pictures. Each of these methods is going to fit your entire spreadsheet on one page. For very large spreadsheets, this can be difficult to read. You may want to consider simply choosing to fit all of your columns or all of your rows on one page instead.
Method 1 –
Method 1 with pictures –
Step 1: Open the spreadsheet in Excel 2013.
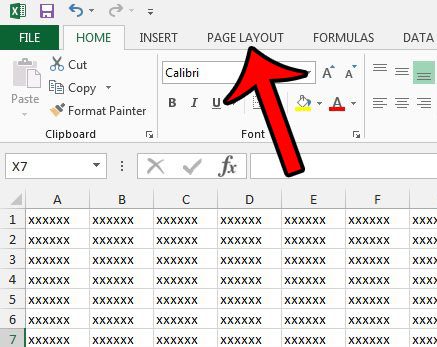
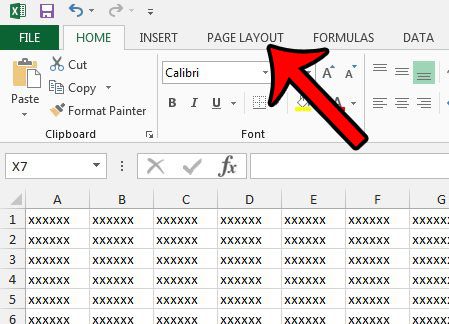
Step 2: Click the Page Layout tab above the ribbon at the top of the window.
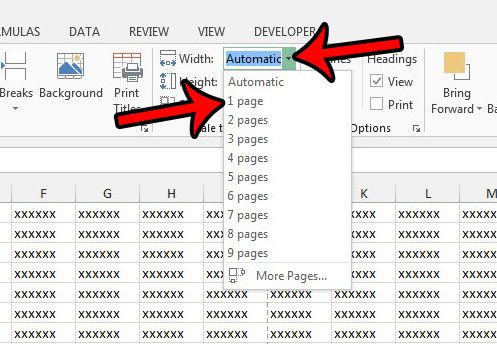
Step 3: Click the Width drop-down menu in the Scale to Fit section of the ribbon, then click the 1 Page option.
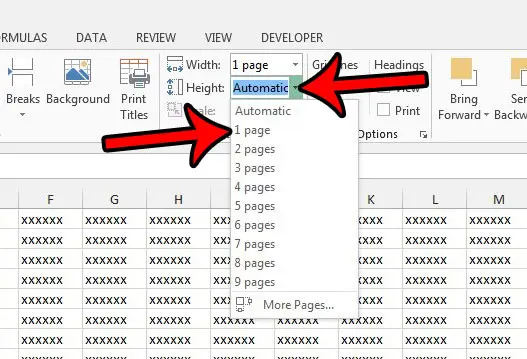
Step 4: Click the Height drop-down menu under the Width drop-down, then click 1 Page.
If you’ve been using a calculator to add values in Excel, then our guide on how to use a formula to add a column in Excel can save you some time.
Method 2 –
Method 2 with pictures –
Step 1: Open your worksheet in Excel 2013.
Step 2: Click Page Layout above the ribbon at the top of the window.
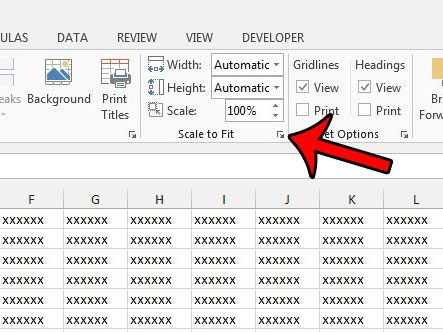
Step 3: Click the small Page Setup dialog launcher at the bottom-right corner of the Scale to Fit section in the ribbon.
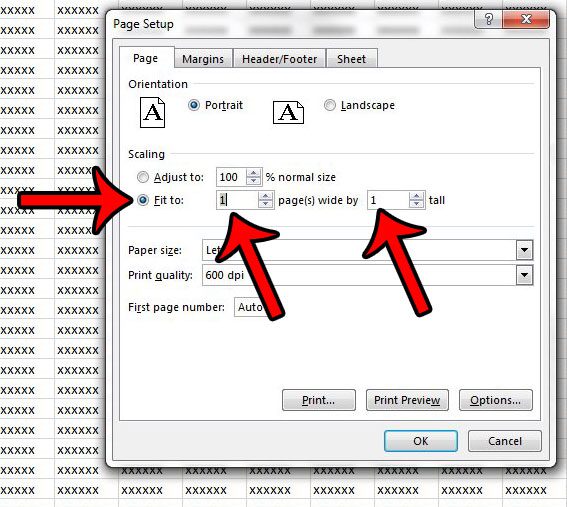
Step 4: Click the circle to the left of Fit to, type 1 into the first field, then type 1 into the second field.
You can then click the OK button at the bottom of the window to apply your changes. Looking for a simple way to give all of your columns the same size? Our Excel make columns same width guide can show you the way to do it.
Method 3 –
Method 3 with pictures –
Step 1: Open your spreadsheet in Excel 2013.
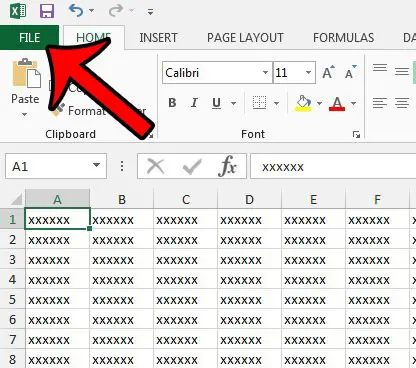
Step 2: Click the File tab at the top-left corner of the window.
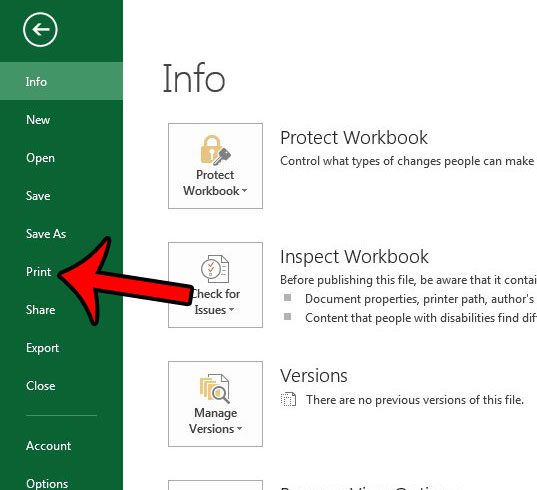
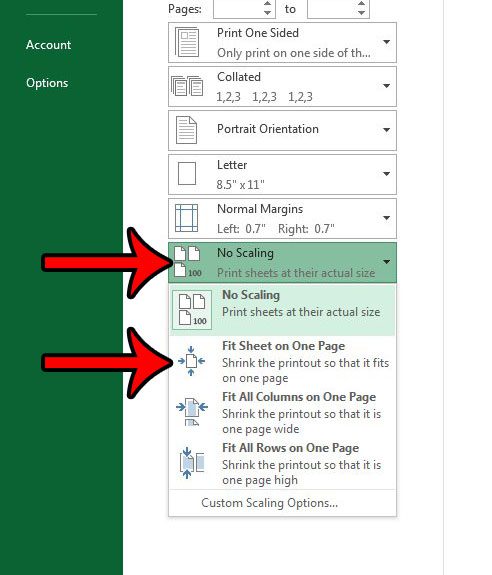
Step 3: Click Print in the column at the left side of the window.
Step 4: Click the No Scaling button at the bottom of the center column (that is its default setting, but you may have previously changed it.
If so, it is the button above Page Setup), then click the Fit Sheet on One Page option. Hopefully you should be able to achieve your desired print settings using one of our methods above for how to fit to one page in Excel. If you are having trouble getting your columns to the correct width to show all your data, then our AutoFit column width shortcut tutorial can help you out. One other thing you might want to try is Google Sheets. I have found that to be an easier spreadsheet application to work with when it comes to printing data. Do you need to print a blank grid from Excel, but are having trouble getting the program to print cells that don’t have any data in them? Learn how to use print areas in Excel 2013 to start printing empty tables and grids.
Additional Sources
After receiving his Bachelor’s and Master’s degrees in Computer Science he spent several years working in IT management for small businesses. However, he now works full time writing content online and creating websites. His main writing topics include iPhones, Microsoft Office, Google Apps, Android, and Photoshop, but he has also written about many other tech topics as well. Read his full bio here.
You may opt out at any time. Read our Privacy Policy
