Rotate a Video Clip 180 Degrees in Windows Live Movie Maker
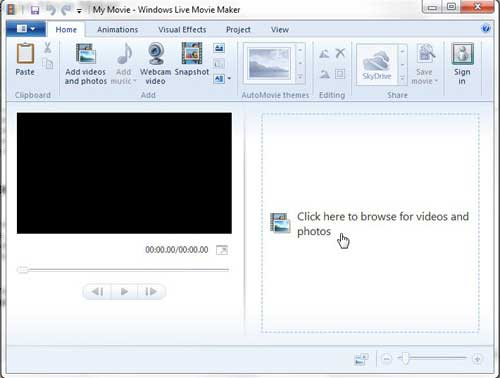
Editing video with Windows Live Movie maker is meant to be as simple as possible. The program’s layout is similar to many other Microsoft programs, such as those included in Microsoft Office, and the options are all laid out in the ribbon navigation system at the top of the window. This is where you will be going to flip your video clip in Windows Live Movie Maker. Step 1: Begin by launching Windows Live Movie Maker. This is done by clicking the Start button at the bottom-left corner of your screen, clicking All Programs, then clicking Windows Live Movie Maker. Step 2: Click the Click here to browse for photos and videos link at the center of the window, then double-click the video file that you want to flip.
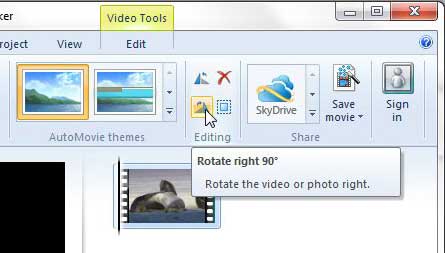
Step 3: Click the Home tab at the top of the window. Step 3: Click the Rotate right 90 button in the Editing section of the ribbon at the top of the window to rotate the video 90 degrees, then click it one more time to rotate the video to 180 degrees from its’ original orientation.
Note that you can apply this effect to only one part of a video clip, if you so choose. This will require you to split your video file into separate segments. To learn more about how to accomplish that, you can read this article about some basic Windows Live Movie Maker options. After receiving his Bachelor’s and Master’s degrees in Computer Science he spent several years working in IT management for small businesses. However, he now works full time writing content online and creating websites. His main writing topics include iPhones, Microsoft Office, Google Apps, Android, and Photoshop, but he has also written about many other tech topics as well. Read his full bio here.
You may opt out at any time. Read our Privacy Policy