Removing the “Sent from my iPad” Signature on iPad Emails
We are going to be focusing specifically on removing the iPad email signature entirely, but you can elect to replace it with something else instead, if you wish. Simply enter your preferred signature in the text field after completing the step below where you delete the existing “Sent from my iPad” signature. A signature can be multiple lines, as well. Step 1: Touch the Settings icon.
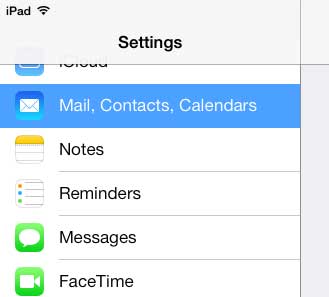
Step 2: Select the Mail, Contacts, Calendars option from the column at the left side of the screen.
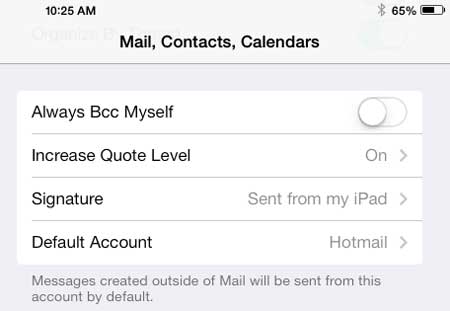
Step 3: Touch the Signature option at the right side of the screen.
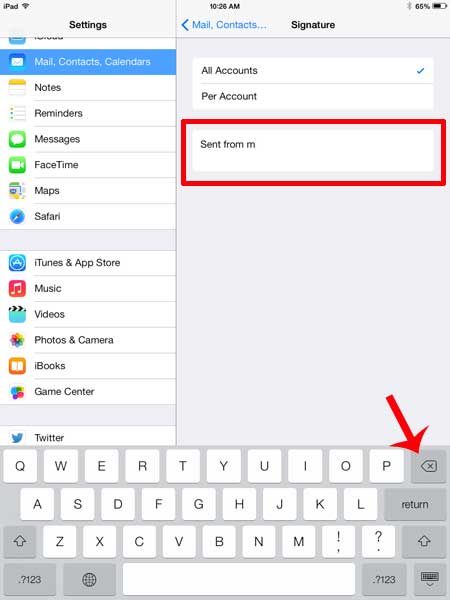
Step 4: Tap inside the signature text field, then touch the Delete key on the keyboard to erase the existing signature.
Note that there is an option at the top of the Signature screen that says All Accounts or Per Account. If you have multiple email accounts on your iPad and want to use a different signature for each account, you can select the Per Account option. This is also something that you can do on your iPhone as well. Read this article about removing the iPhone email signature. After receiving his Bachelor’s and Master’s degrees in Computer Science he spent several years working in IT management for small businesses. However, he now works full time writing content online and creating websites. His main writing topics include iPhones, Microsoft Office, Google Apps, Android, and Photoshop, but he has also written about many other tech topics as well. Read his full bio here.
You may opt out at any time. Read our Privacy Policy


