Luckily you won’t need to manually copy and paste all of your existing cells to new locations, as you can actually insert an entire column in the middle of an Excel spreadsheet. Our tutorial below will show you how to add a column in Excel 2013.
How to Add a New Column to a Spreadsheet in Excel 2013
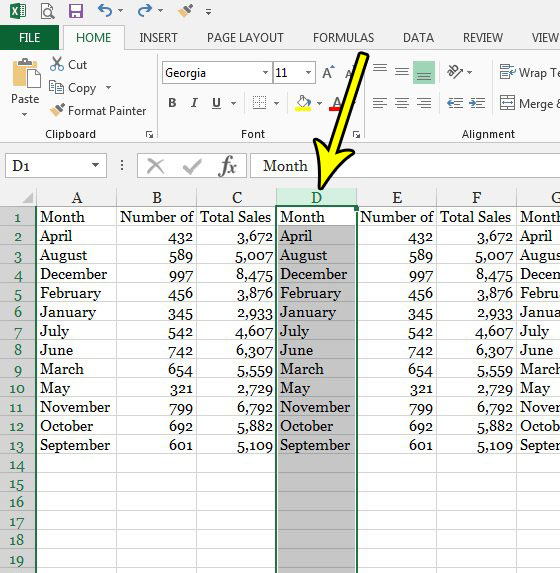
The steps in this article were performed in Microsoft Excel 2013, but will also work in most other versions of Excel. This guide assumes that you have an existing spreadsheet, and that you wish to add a new, blank column between two existing columns. Step 1: Open the spreadsheet to which you wish to add a new column. Step 2: Click the column letter to the right of where you wish to add the new column. I want to put the new column between columns C and D, so I am selecting column D.
Step 3: Right-click the selected column letter, then choose the Insert option.
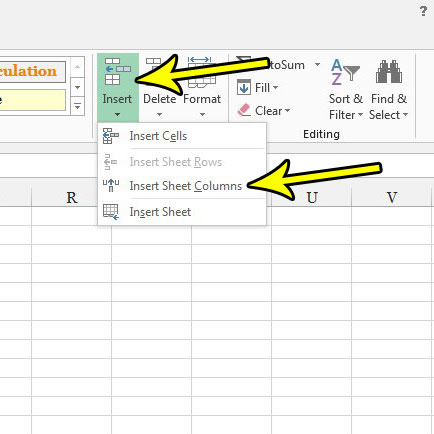
Note that you can also add a column in Excel by selecting the column letter as we did in Step 2 above, then clicking the Home tab, selecting Insert in the Cells section of the ribbon, and choosing the Insert Sheet Columns option.
If you are unable to complete these steps to add a column, then it’s possible that your spreadsheet is protected from editing. If it is protected, then you will need to get the password to unlock it, then click the Review tab at the top of the window and choose the Unprotect Sheet option. Would you like to be able to password protect your worksheet so that other people aren’t able to edit it? Find out how to require a password in Excel 2013 and stop people from making changes to your work. He specializes in writing content about iPhones, Android devices, Microsoft Office, and many other popular applications and devices. Read his full bio here.