Our guide below will show you several different ways that you can make the Word 2013 ribbon visible again.
Keeping the Ribbon Visible in Word 2013
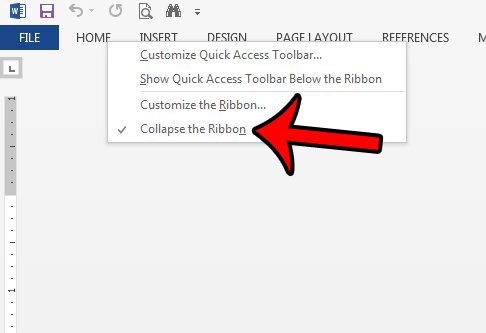
The steps below will assume that your ribbon is currently minimized in Word 2013, which means that you can only see the tabs at the top of the window, and that the ribbon only becomes visible when you click one of the tabs. Once you have completed the steps below, the ribbon will remain visible and expanded. Here is how to keep the ribbon visible in Word 2013 – The steps are also show below with pictures – Step 1: Open Word 2013. Step 2: Right-click the Home tab, then click the Collapse the Ribbon option.
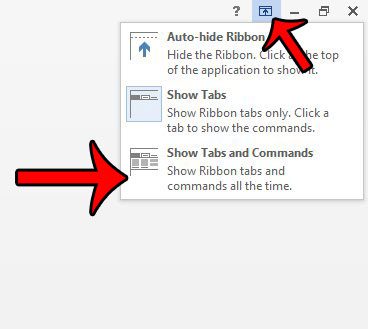
Note that you can actually right-click any of the tabs (Insert, Design, Page Layout, etc.) and select the Collapse the Ribbon option. There are a couple of other methods that you can use to keep the ribbon visible as well – Alternate Method 1 – Double-click any of the tabs. Alternate Method 2 – Hold down the Ctrl key, then press the F1 key. This will switch between a visible and minimized ribbon. Alternate Method 3 – Click the Ribbon Display Options button at the top-right corner of the window, then click the Show Tabs and Commands option.
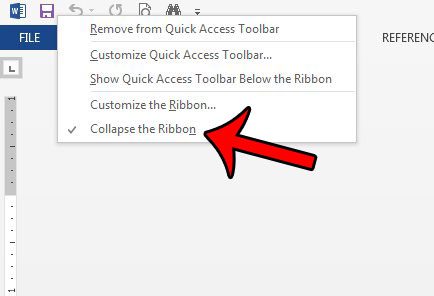
Alternate Method 4 – Right-click an item in the Quick Access Toolbar (such as the Save icon), then click the Collapse the Ribbon option.
One other hidden element in Word 2013 that you might want to display is the ruler. Learn how to show the ruler in Word 2013, and find out which rulers can be visible depending upon the view you are currently using in the program. After receiving his Bachelor’s and Master’s degrees in Computer Science he spent several years working in IT management for small businesses. However, he now works full time writing content online and creating websites. His main writing topics include iPhones, Microsoft Office, Google Apps, Android, and Photoshop, but he has also written about many other tech topics as well. Read his full bio here.
You may opt out at any time. Read our Privacy Policy


