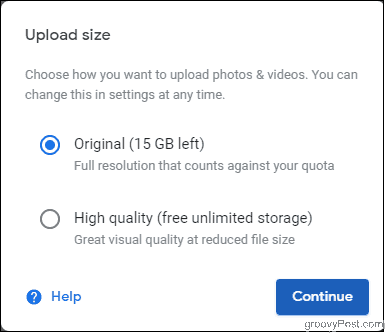
If you pick the Original option, Google only gives you 15 GB of space — and that fills up quickly. If you pick the High-quality option, Google offers you free unlimited storage. The trade-off? Compressed files.
Compressing image files so that they consume less storage space does not necessarily mean lower image quality — but it can. Either way, the odds are that the changes Google Photos makes to your images will be barely noticeable to the naked eye, even when you blow them up and print them.
First, download your photos from Google to your computer
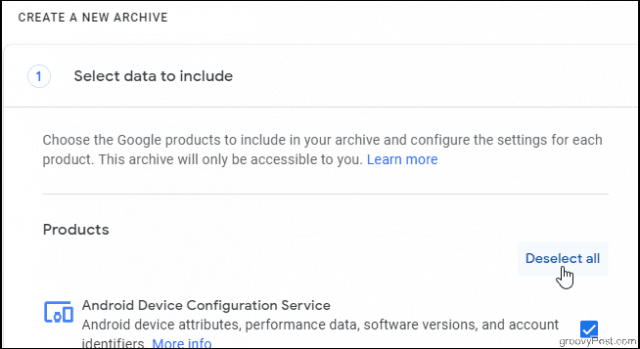
Visit Google Takeout on the computer you want to download to, making sure you’re signed in to the account that holds your pictures. This is where you’ll select the data you want to download, and you’ll see data from all the Google products you’re using, like Chrome, YouTube, Maps, etc. Since we’re just going to download photos, go ahead and click Deselect all.
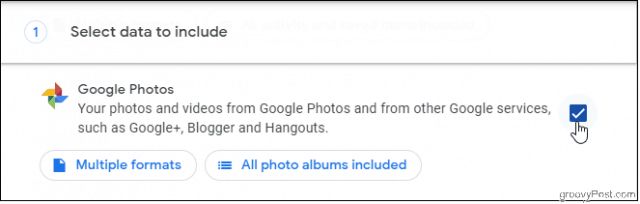
Then, scroll down the list to select Google Photos.
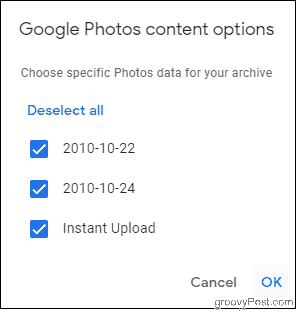
You have the option to choose which albums to download by clicking the All photo albums included button. By default, all your albums will be downloaded, but if you know there are a few you don’t want, you can deselect those here. When you’re done, click Next Step at the bottom of the page.
Customizing the Archive Format
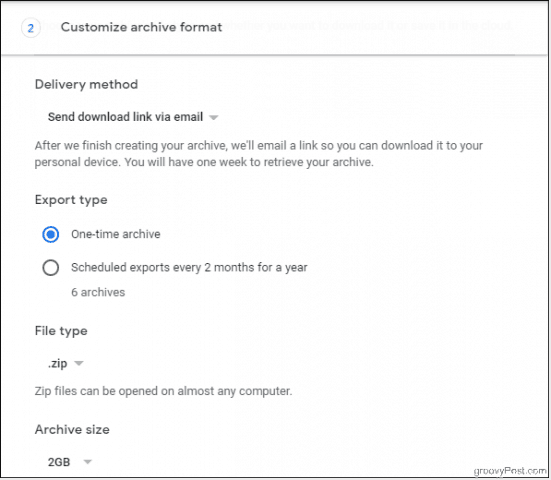
This next batch of settings focuses on the format of your download. Under Delivery Method, choose whether you’d like to receive a download link in your email or have it sent to another storage provider, such as Dropbox or OneDrive. You can also add the archive to Google Drive, but keep in mind that this will count against your storage quota. So if you’re running low on storage in your Google account, be sure to pick a different delivery method. You can leave the Export type as a one-time archive and the File type as Zip. Google allows you to choose from archive sizes ranging from 1 GB to 50 GB. The bigger the zip file, the longer it’ll take to download and extract. However, choosing a small size when you have thousands of pictures means you’ll end up with many zip files to download.
Click Create archive. Google sends an email notifying you of your archive request. You’ll get another email when your archives are ready. This can take a while if you have a lot of photos and videos in your account. You can always visit the Manage archives page to check if your archive is ready and manage existing archives.
Download your Archives
Click Download, either on the Manage archives page or from your email. You’ll be prompted to sign in to your account again for security purposes. The download will begin. Once it’s finished, extract the .zip file, and you’re ready to upload.
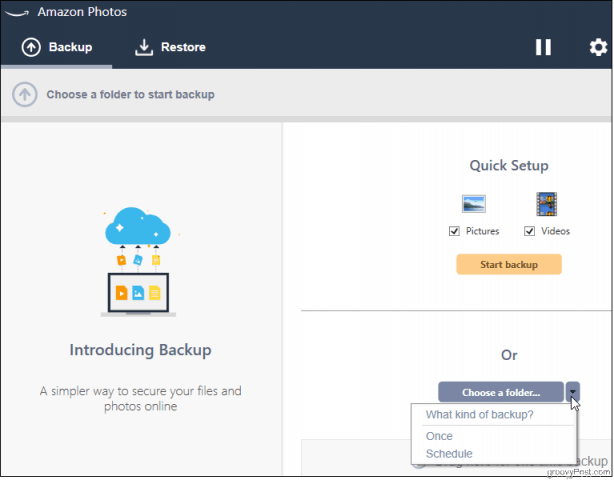
You can use Quick Setup to auto-backup photo and video folders on your computer, but for now, let’s do a one-time backup of those Google archive folders.
Next steps


![]()
