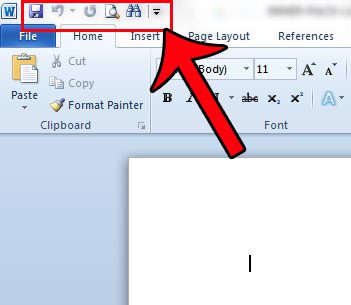
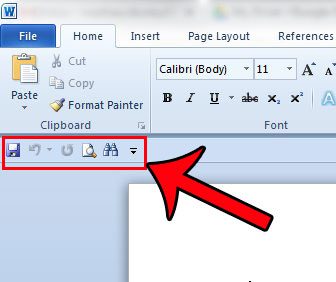
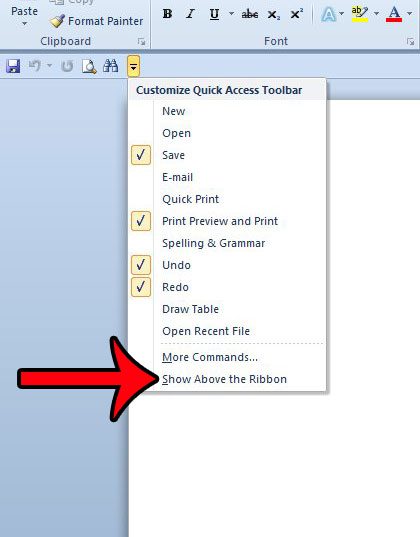
The Quick Access toolbar can be displayed in one of two places. It can either be above the Office ribbon, or below it. If your Quick Access toolbar is currently in a location that you are not happy with, then you can follow the steps in our guide below and learn how to move it.
Moving the Quick Access Toolbar Above or Below the Office Ribbon in Word 2010
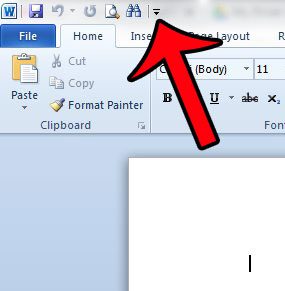
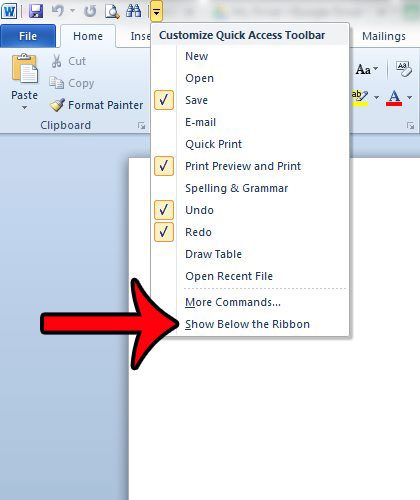
The steps below will show you where to find the settings to specify the location of your Quick Access toolbar. If you wish to add more options to this toolbar, such as an Advanced Find feature, then the steps in this article will show you what to do. Customizing the Quick Access toolbar provides you with a lot of different options to access your frequently used commands in a more convenient way. Step 1: Open Microsoft Word 2010. Step 2: Locate the Quick Access toolbar. It will either be at the top-left hand corner of the window, or it will be below the ribbon. or Step 3: Click the Customize Quick Access Toolbar button (the icon with the downward facing arrow.) Step 4: Click the Show Below the Ribbon button or the Show Above the Ribbon option, depending upon where the toolbar is currently located. or Do you find that the Office ribbon is taking up too much of your screen, and that you would prefer it to be hidden until you need it? Learn how to hide the ribbon in Word 2010 and use more of your window for your document. After receiving his Bachelor’s and Master’s degrees in Computer Science he spent several years working in IT management for small businesses. However, he now works full time writing content online and creating websites. His main writing topics include iPhones, Microsoft Office, Google Apps, Android, and Photoshop, but he has also written about many other tech topics as well. Read his full bio here.
