Our guide below will walk you through the process of formatting a Word 2013 table so that the header row, which contains the descriptions of the data that appears in your table columns, will repeat at the top of the page when your table extends onto additional pages. This makes the table much easier to read, and will minimize the risk that your readers will inadvertently attribute a table cell to the wrong column.
How to Print a Table Header on Each Page in Word 2013
The steps in this article are going to show you how to include a header row at the top of each printed page of a Word 2013 table. You can do a similar thing in Excel if you would prefer to work in that program instead. Step 1: Open your document in Word 2013. Step 2: Click inside the header row of the table for which you wish to print the header row at the top of each page.
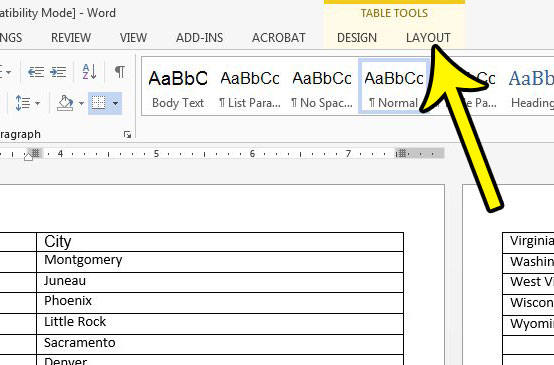
Step 3: Click the Layout tab under Table Tools at the top of the window.
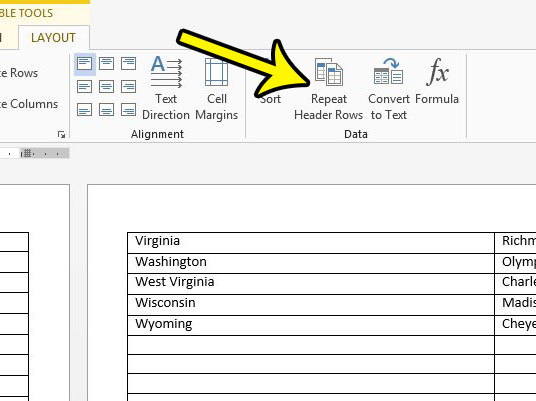
Step 4: Click the Repeat Header Rows button in the Data section of the ribbon.
If you are in Print Layout view, you should now see your header row at the top of the table on each new page. If you are not in Print layout view, you can get there by clicking the View tab at the top of the window, then clicking the Print Layout option in the Views section of the ribbon. You will also be able to see the repeated header row in Print Preview. Does your school or job require that your documents are double-spaced? Learn how to use double spacing in Word 2013 either for a single document, or by default for every new document you create. He specializes in writing content about iPhones, Android devices, Microsoft Office, and many other popular applications and devices. Read his full bio here.