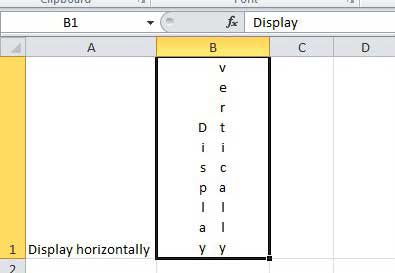
Our article continues below with additional information and pictures of these steps. You are able to write vertically in Excel, or make text vertical in Excel, if you have a project that requires your text to be displayed in that fashion. The method for performing either action is the same. The only variable is when you choose to click the Vertical Text option on the Orientation menu. We will discuss the steps required to write vertically in the article below. Microsoft Excel 2010 has a large set of tools that you can use to modify or summarize your data. Many people will only ever barely scratch the surface of the options that they have at their disposal. This can be because they have no need for the functions these tools provide. They may also simply not know that such tools existed. You could choose to convert text to numbers in Excel, for example, if you found incorrect formatting. One such tool that you can use to your benefit in Excel is an option that will display your text vertically instead of horizontally. This can be particularly helpful in situations where you are creating a document or spreadsheet specifically for the purpose of printing it out, or if you have unusual layout requirements for a project. Check out our guide on how to wrap text in Google Sheets if you have started to use Google’s spreadsheet application, too.
How to Write Text Vertically in Excel 2010
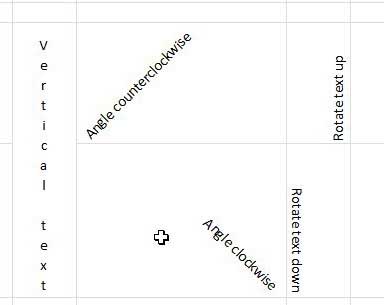
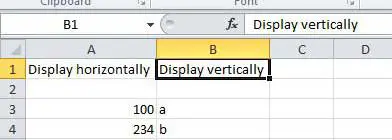
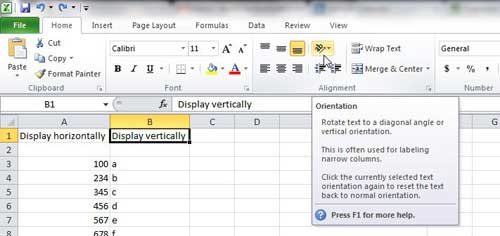
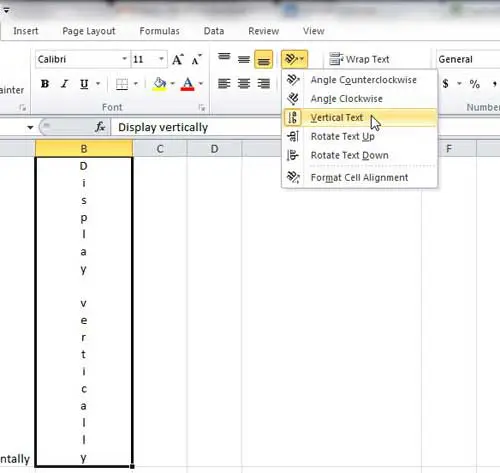
The text rotation tool in Excel is actually more than just a two-option tool. You can choose from the following orientation settings for how you would like to display your text: Angle counterclockwise – text is orientated from bottom-left corner of cell to upper-right Angle clockwise – text is orientated from upper-left to bottom-right corner Vertical text – each letter is underneath the letter that preceded it Rotate text up – text runs from bottom of cell to top of cell Rotate text down – text runs from top of cell to bottom of cell Format cell alignment – the more advanced option, which will even let you specify the degree of orientation that you want to employ One thing to consider when you are rotating your text vertically is that it will drastically increase the row height, which will also affect the height of every other cell in that row. In my example image above, I have used the Merge cells option on the Format cells menu to combine multiple rows and keep my spreadsheet more aligned. Step 1: To begin formatting the alignment of a cell, open the spreadsheet file that contains the cell value you want to rotate vertically. Step 2: Click on the cell that you want to rotate. If you want to rotate multiple cells simultaneously, hold down the Ctrl key on your keyboard and click on each cell. You can also select an entire row or column by clicking the row number or column letter at the left or top part of the spreadsheet. Step 3: Click the Home tab at the top of the window, then click the Orientation button in the Alignment section of the ribbon. The ribbon is the horizontal menu at the top of the window. Step 4: Click the orientation option that you want to apply to your selected cell(s) to modify their orientation. Remember to check the earlier image to see an example of which type of orientation you want to apply to your cell. You may have a lot of data in your cell and want to split up your vertical text into two columns. First, select your cell. You can then click your mouse in the formula bar at the point where you want to insert the line break. Finally, hold the Alt key and press Enter on your keyboard. The result will look something like the image below. You can change your orientation at any time by clicking the cell then choosing a different option from the Orientation drop-down menu.
Summary – How to make text vertical in Excel
As mentioned earlier, this will make the text vertical inside the cell if that text is already there. It can also set the cell to allow you to write vertically if the cell is currently blank.
Additional Information on Excel Vertical Text
If you have a cell with vertical text that you would like to change back to horizontal text, then you can select the cell, click the Orientation option, and click Vertical Text. There isn’t an option on that menu for horizontal text. However, clicking one of the other text orientation options will enable that orientation, while clicking it again will disable it. Using vertical text in Microsoft Excel can cause some unexpected or unwanted things to happen. This is especially true with the size of your rows and columns. You can always adjust the height of a row or the width of a column by right-clicking on the row number or the column letter and choosing the Row height or Column width option. There you will find a field where you can manually set the height or width of that cell range. This allows you to make the cells as large or small as needed. Occasionally you may also want to make your text “vertical” by stacking multiple lines of data on top of one another in a single cell. To create a line break like this simply position your mouse cursor inside the cell at the point where you want the line break. You can then hold down the Alt key on your keyboard and press Enter. Are you ready to print your spreadsheet, but you’re having trouble formatting it the right way? Check out our Excel printing guide for some options to adjust that will make your printed spreadsheet easier to read. After receiving his Bachelor’s and Master’s degrees in Computer Science he spent several years working in IT management for small businesses. However, he now works full time writing content online and creating websites. His main writing topics include iPhones, Microsoft Office, Google Apps, Android, and Photoshop, but he has also written about many other tech topics as well. Read his full bio here.
You may opt out at any time. Read our Privacy Policy
