For many Windows 7 users, the Navigation Pane is an important part of how they navigate through their computers, so it can be frustrating to locate certain files or folders if that option is gone. Fortunately you can re-enable display of this pane by following our tutorial below.
How to Display the Navigation Pane in Windows 7
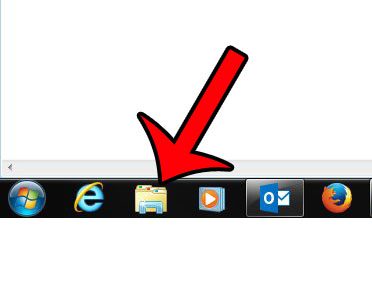
The steps in this article will assume that your navigation pane is currently hidden from view in Windows Explorer. Following the steps below will cause the navigation pane to be displayed at the side of the window in Windows Explorer, allowing you to access your favorites more easily. There are several ways to open Windows Explorer, but the quickest way is through an icon in your taskbar. If you do not have an icon for it in your taskbar, then this article will show you how to add one. Step 1: Click the folder icon in the taskbar at the bottom of your screen. If the folder icon is not there, then simply open any folder on your computer, or click the Start icon at the bottom-left corner of the screen, then type “windows explorer” into the search field and press Enter on your keyboard.
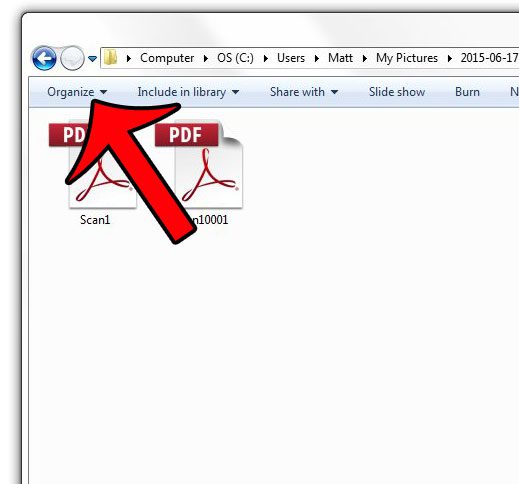
Step 2: Click the Organize button in the blue bar near the top of the window.
Step 3: Click the Layout option, then click the Navigation Pane option.
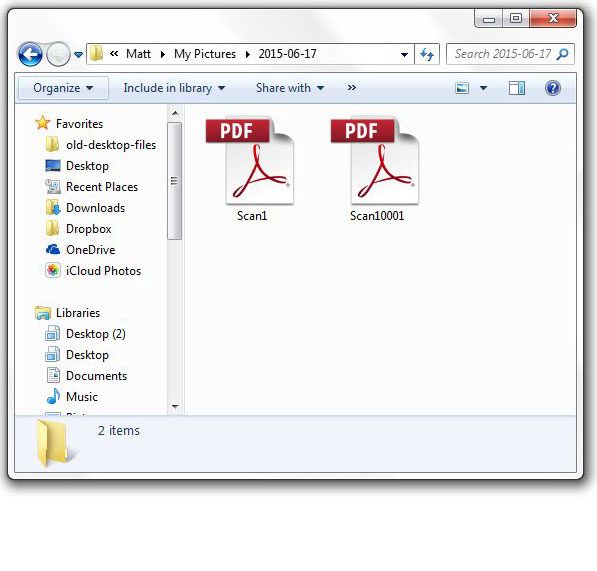
You should now see the Navigation Pane as the column at the left side of the window.
Are there hidden files or folders on your computer, such as the AppData folder, that you need to access? Learn how to display these hidden files so that you can find them more easily. After receiving his Bachelor’s and Master’s degrees in Computer Science he spent several years working in IT management for small businesses. However, he now works full time writing content online and creating websites. His main writing topics include iPhones, Microsoft Office, Google Apps, Android, and Photoshop, but he has also written about many other tech topics as well. Read his full bio here.
You may opt out at any time. Read our Privacy Policy


