There is a lot that you will need to know, much of which is confusing and probably new to you unless you have a background in building websites. But it’s actually easier than ever to create your own website, and you can get started with a self-hosted WordPress site that will let you grow easily without having to worry about switching to something else in the future.
Getting Started
The process of creating a website can be boiled down to three basic steps. Obviously, there are multiple different actions that you will need to take during each of these steps, but accomplishing them each puts you on the right path to having the site built that you can start writing on and sharing with your audience. I personally like to purchase my domains from Google Domains because it’s easy, and you can set up private domain registration easily and without any additional cost. Plus, if you already have a Google Account and have a payment method set up, it’s probably the fastest way to buy a domain name. All you need to do is go to the Googe Domains website, search for a domain, select it, then choose how many years you want the domain registered for. After you have selected and registered a domain, you then need to set up a Web hosting plan where you can upload, store and host the files for your website.
Setting Up a Web Hosting Plan With Cloudways
There are many different possible hosting providers, many of whom provide a good service that is easy to navigate. Additionally, if you haven’t already registered a domain, many hosting providers also provide you with the ability to register a domain while setting up your hosting plan. The choice is yours, but my personal preference, after using several different providers for a variety of different website types, is Cloudways. They are a cloud hosting provider where you can set up your server with a number of different places like: If you have decided to go with Cloudways then you can just follow the steps below to sign up for a plan and get started.
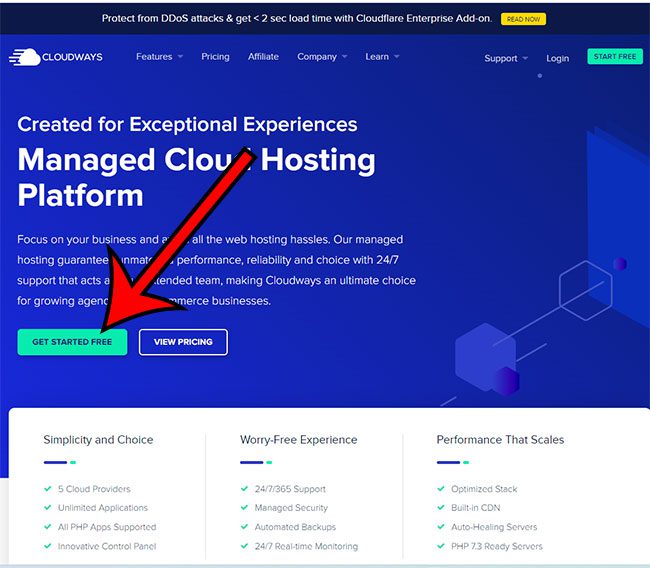
Step 1: Go to the Cloudways website and click Get Started Free.
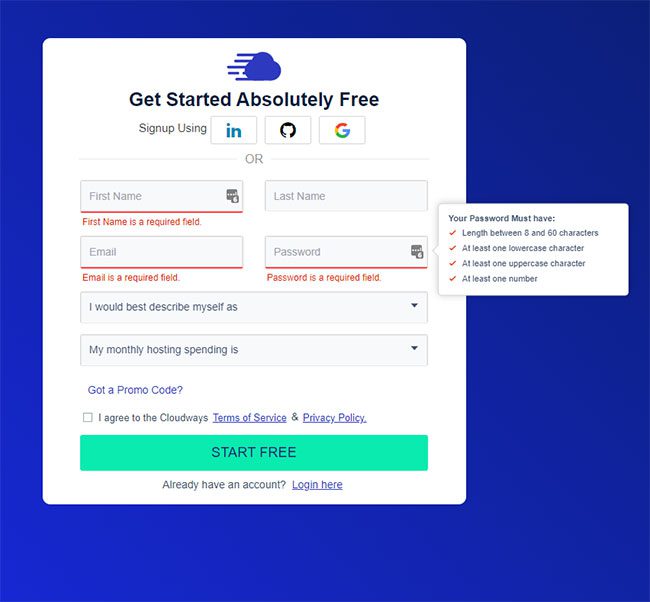
Step 2: Enter account details then click the Start Free option.
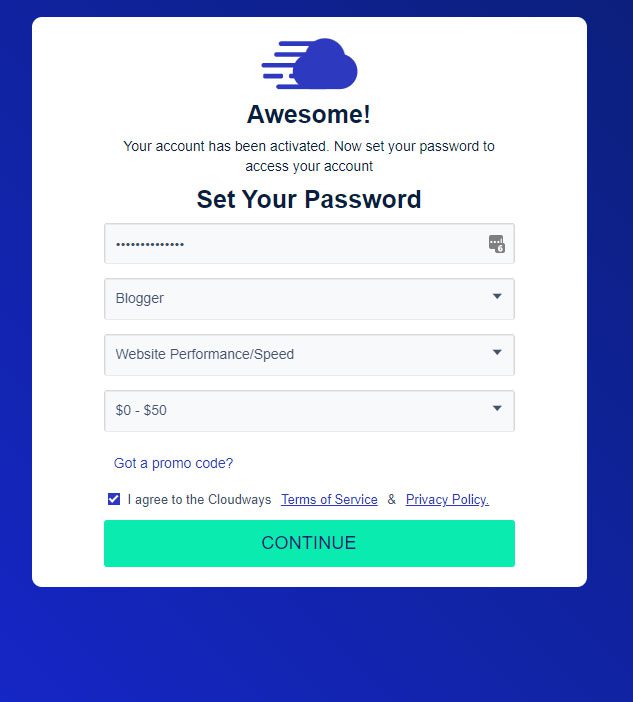
Step 3: Choose the appropriate descriptions from the dropdown list, then click Continue.
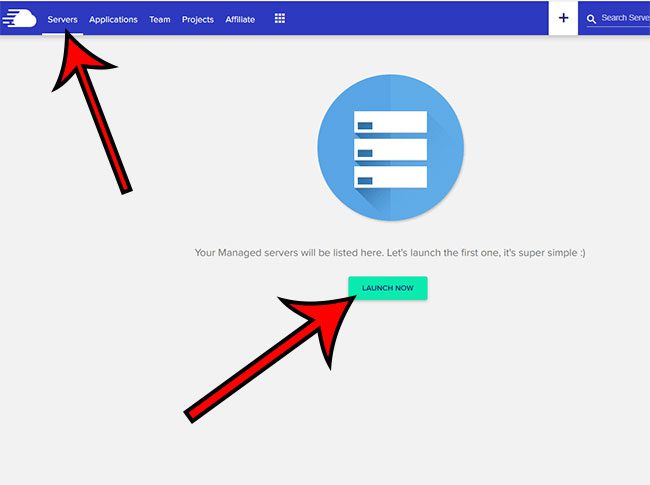
Step 4: Select the Servers tab, then click Launch Now.
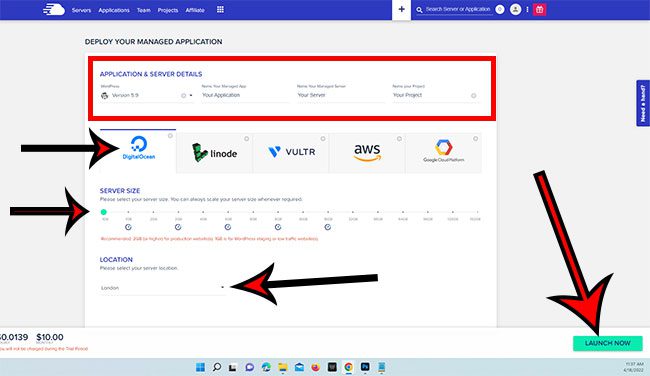
Step 5: Adjust the settings on this screen to meet your needs, then click the Launch Now button to create your server.
You will note in the picture above that I have chosen a 1 GB plan with Digital Ocean, which is the cheapest option that you can get for a hosting plan here. The items that you will need to choose when you are setting up your Cloudways hosting account are:
WordPress install optionApplication Name – I usually use whatever I am going to call my websiteManaged server name – If I am only creating one website, then I also name this like my websiteProject name – this is the website name, too.Server companyServer sizeLocation – You will want to pick a location that is closest to where your target audience lives
After you launch the website it will take Cloudways a couple of minutes to set up your server. Once it is finished you will be able to choose Applications at the top of the window, then see all of the details for your WordPress install. You are going to need some of this information to connect your domain name and your Cloudways account, then you are ready to get started. Now that you have your domain and your hosting plan, it’s time to set up your website and begin adding content.
Additional Sources
After receiving his Bachelor’s and Master’s degrees in Computer Science he spent several years working in IT management for small businesses. However, he now works full time writing content online and creating websites. His main writing topics include iPhones, Microsoft Office, Google Apps, Android, and Photoshop, but he has also written about many other tech topics as well. Read his full bio here.