These apps are only as good as the hardware you’re using, however. You may need to adjust your microphone settings for your environment and get it ready to speak with friends, family, and colleagues. To make this easy, Windows 11 includes a built-in tool to help you test your microphone. If you’re unsure how, here’s how to test a microphone on a Windows 11 PC.
How to Set Up a Microphone on Windows 11
Before you begin, you’ll need to make sure your mic is working properly on your PC.
Connect Your Microphone and Install Drivers
The obvious first step is to make sure your hardware is connected properly. Check your USB ports are working and any cabling is connected properly. If the mic is built-in, you should check it’s enabled and working in Device Manager. If you’re using a Bluetooth device, make sure to connect and pair it with your PC. You’ll need to make sure you’ve switched your Bluetooth radio on before you try this. Whether you’re using a USB or Bluetooth microphone, you should also ensure that you’ve updated your device drivers.
Setting Your Microphone as Your Input Device
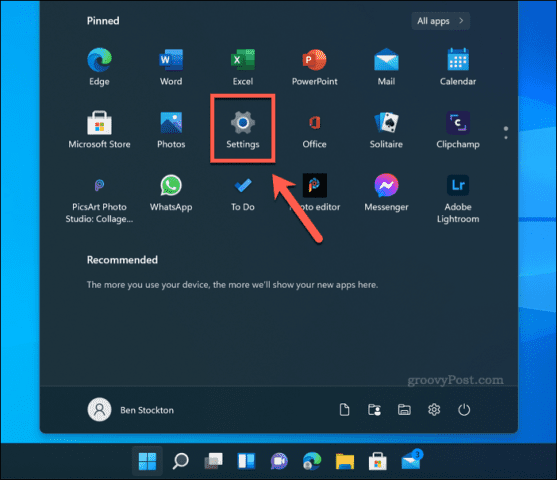
If you’re sure the microphone is connected and ready to use, you can check that it’s detected in the sound settings menu. To access this, right-click the sound icon in the bottom-right area of the taskbar and select Sound settings.
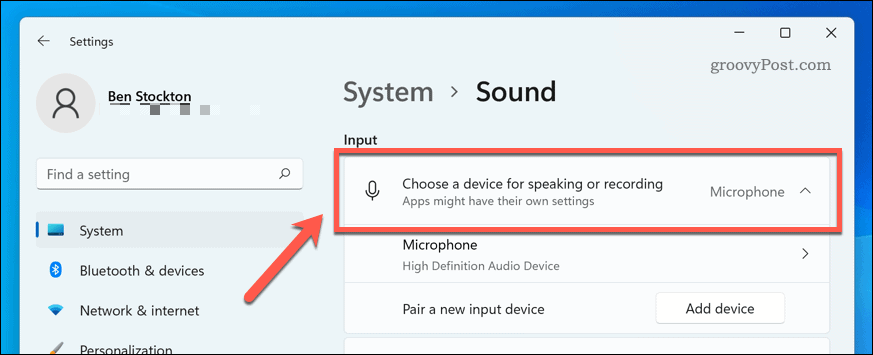
In the Sound menu, you should see your microphone appear as a device in the Input menu. If it isn’t already, select it as your active input device by pressing choose a device for speaking and recording and selecting it from the list.
How to Test a Microphone on Windows 11
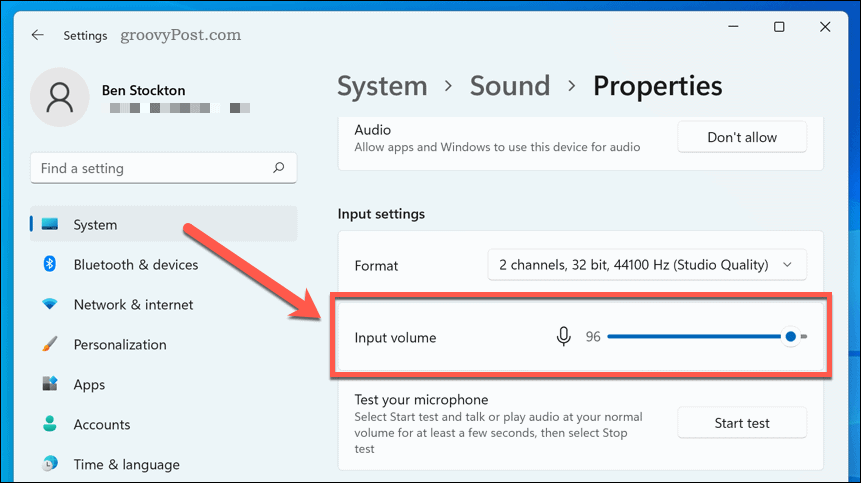
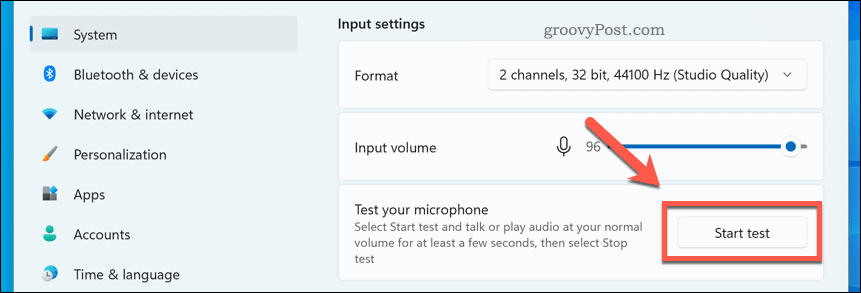
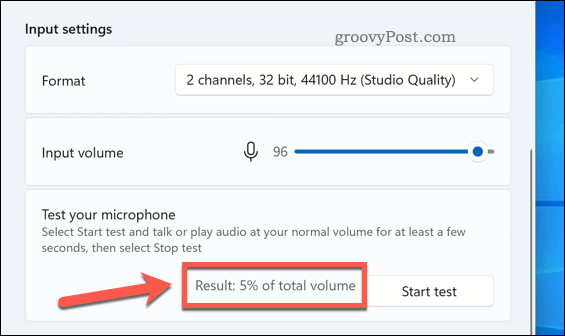
At this point, your microphone should be ready for use, meaning it’s connected, switched on, and with the correct drivers installed. You should also have been able to select it as the input device in your sound settings. Your next step is to test your microphone and configure your input settings so that your microphone sounds clear, crisp, and ready for chatting or recording. The easiest way to do this is to use the built-in testing tools in the sound settings menu. To test a microphone on Windows 11: At this point, your Windows 11 mic should be ready to use. You can begin to use it to record, stream, or make voice calls in apps like Discord or Zoom. If you’re still having trouble, make sure to adjust your input volume settings further. You could also think about using apps from your microphone manufacturer which may include additional settings and configuration tools. Third-party alternatives also exist, such as VoiceMeeter, which allows you to increase your microphone boost levels.
Using Windows 11
The steps above should help you to quickly test a microphone on Windows 11. If you’re having trouble, make sure to check for new updates for your system and device drivers. Still running Windows 10? While the steps are different on Windows 11, you can still configure your sound settings in the Settings app on Windows 10. Comment Name * Email *
Δ Save my name and email and send me emails as new comments are made to this post.


![]()
