One of the options that you will find in Microsoft Excel 2010 is an “autofill” button that appears when you paste content into your cells. While the assorted options that are included with that button can allow you to perform certain pasting actions more quickly, the presence of the button can lead to misclicks, and it can make it difficult for you to make adjacent selections. You can remove the autofill or paste options button in Excel by going to File > Options > Advanced > then unchecking the box to the left of Show Paste Options button when content is placed. The Auto Fill feature in Microsoft Excel 2010 is very useful when you need to fill a series of cells with a series of numbers. In fact, it can be a real time-saver when you need to number rows in a spreadsheet. But the Auto Fill feature often includes a pop-up Auto Fill Options button that can be a bit of an annoyance, and can even make it difficult to view data in some of your cells. Our guide below will show you the setting to change so that you can disable this Auto Fill Options button in Excel 2010.
How to Turn Off the Auto Fill Options Button in Excel 2010
Our guide continues below with additional information on removing the autofill button in Excel, including pictures of these steps.
How to Stop the Auto Fill Options Button from Appearing in Excel 2010 (Guide with Pictures)
The steps in this article are going to stop the Auto Fill Options button from appearing while you are working in Excel 2010. The button that we are talking about is the one shown in the picture below. Note that making the change outlined in the steps below will also stop the Paste Options button from appearing as well.
Step 1: Open Excel 2010.
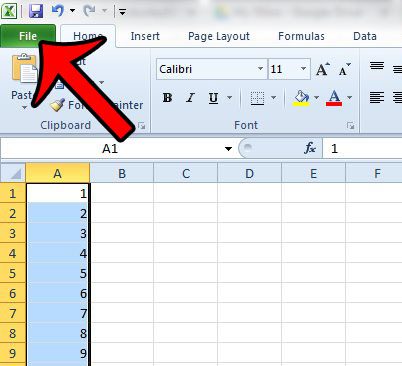
Step 2: Click the File tab at the top-left corner of the window.
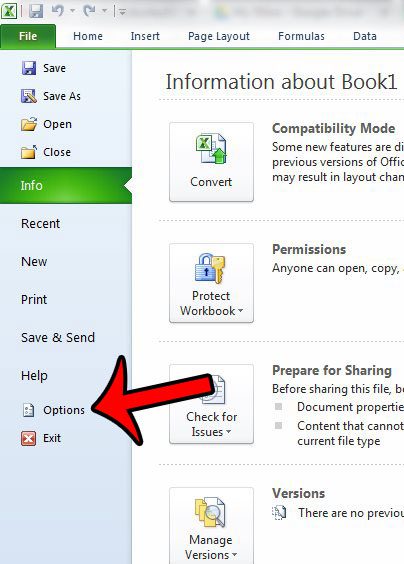
Step 3: Click Options in the column at the left side of the window.
Clicking this will open the Excel Options dialog box where you can not only disable auto fill, but also adjust a number of other editing options with which you may have been having some trouble.
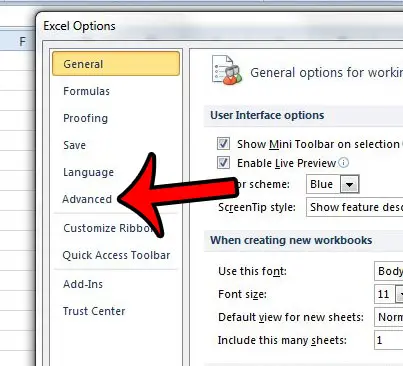
Step 4: Click the Advanced tab on the left side of the Excel Options window.
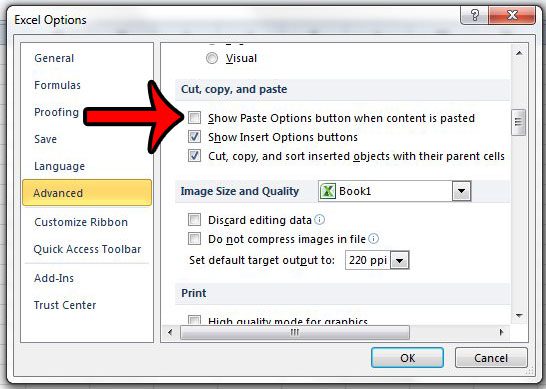
Step 5: Scroll down to the Cut, copy and paste section of the menu, click the box to the left of Show Paste Options button when pasted to remove the check mark, then click the OK button at the bottom of the window to apply your changes.
Our tutorial continues in the next section with additional discussion on enabling or disabling the Excel autofill buttons.
More Information on How to Turn Off or How to Turn On Autofill in Excel
As mentioned previously, this is going to disable both the Auto Fill Options button and the Paste Options buttons. If this isn’t resolving the autofill issue that you are experiencing, then you may need to adjust another setting concerning the AutoComplete feature. You can turn AutoComplete on or off in Excel 2010 by going to File > Options > Advanced, then scrolling down to the Editing section and turning off the option for Enable AutoComplete for cell values. While it can be tempting to want to shut off Autofill using the steps that we have outlined in this article, it does provide access to some convenient features, such as the ability to paste without formatting. often one of the biggest issues, when you paste data from another source, is that you need to undo all of the formatting that the data brought with it. This Excel feature removes all of that formatting so that only the data itself is pasted into your cells. Staying in the Editing section of the Advanced tab we also find a check box where we can control a setting called Enable fill handle and cell drag and drop. In addition to the ability to toggle Enable AutoComplete, these items expand on the autofill feature so that you can quickly fill formulas into other cells, or drag and drop existing cell values into some of the other cells in your spreadsheet. Do you have an Excel worksheet where you need to make all of your rows the same height, but you don’t want to set individual row heights for every row in the spreadsheet? Learn how to apply the same row height to multiple rows in Excel 2010 and save yourself some time and frustration.
Additional Sources
After receiving his Bachelor’s and Master’s degrees in Computer Science he spent several years working in IT management for small businesses. However, he now works full time writing content online and creating websites. His main writing topics include iPhones, Microsoft Office, Google Apps, Android, and Photoshop, but he has also written about many other tech topics as well. Read his full bio here.