Your iPhone can connect to cellular and Wi-Fi networks to download data from the Internet. You can read here to learn which type of network connection you are currently using. While Wi-Fi connections are typically faster than cellular, it is very possible that you can connect to a cellular network and get very fast download speeds. One of the more common types of networks where these fast speeds can be found is called LTE (long term evolution). But with these faster download speeds come certain drawbacks, specifically for iPhone users that have limited data plans. The ability to use faster Internet can cause you to use a lot more data, which could lead to overage chargers from your cellular provider if you go above your monthly data allotment. For this reason, you may be looking for a way to disable the LTE connection on your iPhone so that you don’t run the risk of overusing it. Our guide below will show you how to turn off the LTE option in iOS 9 so that you only connect to 3G or lower networks. The steps below were performed on an iPhone 6 Plus, in IOS 9.2. If your iPhone is using iOS 10, then these steps are slightly different. You can click here to jump to the section of this article where we turn off LTE in iOS 10.
Summary – how to turn off LTE on an iPhone in iOS 9 –
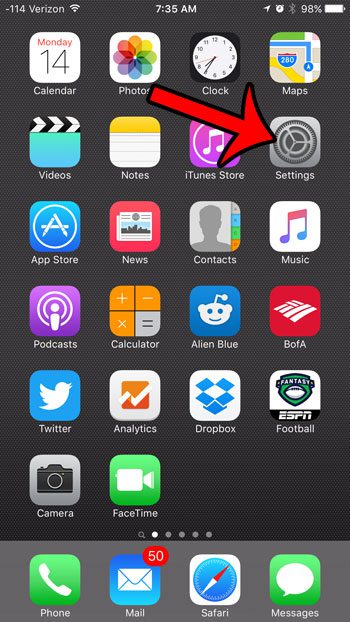
These steps are also repeated below with pictures – Step 1: Tap the Settings icon.
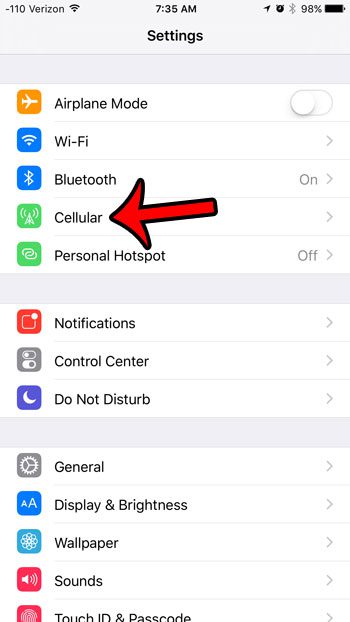
Step 2: Select the Cellular option near the top of the screen.
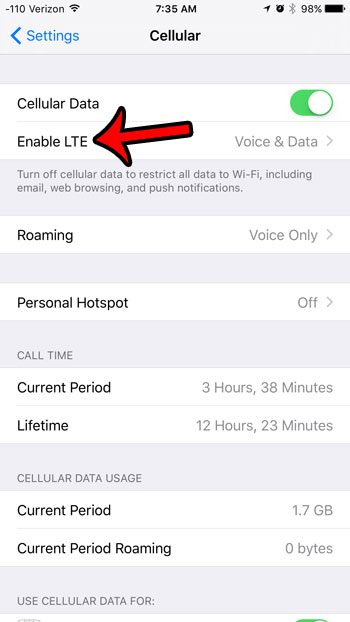
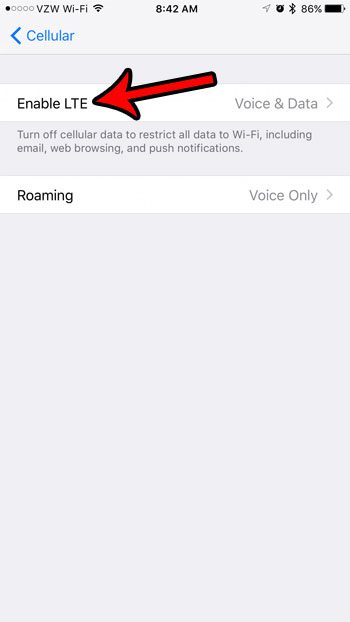
Step 3: Select the Enable LTE option near the top of the screen. If LTE is on, then it should say either Voice & Data or Data Only.
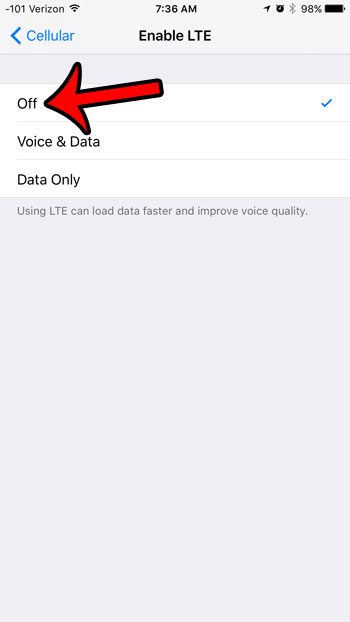
Step 4: Tap the Off button. There will be a check mark to the right of Off when you have disabled LTE on your device.
How to Turn Off LTE in iOS 10
Step 1: Tap the Settings icon.
Step 2: Select the Cellular option.
Step 3: Touch the Cellular Data button.
Step 4: Tap the Enable LTE option.
Step 5: Select the Off option.
There are several reasons why you might want to turn off LTE on an iPhone. Sometimes you will find yourself in an area where the cellular reception is inconsistent, and the phone is constantly switching between different types of networks. Because LTE is the faster option, the iPhone will typically default to that type of network when it can find it. However, this could create issues where you have difficulty downloading data or making phone calls. Additionally, being on an LTE network can indirectly cause you to use more data, simply because it downloads faster. if you are near your monthly data cap and are concerned about going over, then turning off LTE can help to reduce your data usage. If you are no longer experiencing the issues that caused you to want to turn off LTE, then you can enable LTE on your iPhone by simply following these steps again and choosing the Voice and Data or Data Only option on the Enable LTE menu. If your iPhone is using a lot of data after you updated to iOS 9, then you may want to look into a setting on your iPhone called Wi-Fi Assist. You can read here to learn how to turn off Wi-Fi Assist. It’s a feature that will use your cellular data connection to download from the Internet when your Wi-Fi connection is not very good. If you are frequently on a bad Wi-Fi network, then Wi-Fi Assist could result in a lot of data usage. After receiving his Bachelor’s and Master’s degrees in Computer Science he spent several years working in IT management for small businesses. However, he now works full time writing content online and creating websites. His main writing topics include iPhones, Microsoft Office, Google Apps, Android, and Photoshop, but he has also written about many other tech topics as well. Read his full bio here.
You may opt out at any time. Read our Privacy Policy