Text wrapping in Word 2010 is a feature that may not initially seem like something that is very important, but the effect that it can have on your document’s overall appearance can be surprising. Images can be a helpful inclusion in many types of documents that you create in Word 2010. But the images will simply be inserted into your chosen location in the document, and may not be formatted in the most visually appealing way. One way that you can solve this issue and make your document more visually appealing is to wrap your text around the picture. There are several different styles of text wrapping that you can choose from, so continue below to learn how use the text-wrapping options in Word 2010.
How To Use Text Wrapping in Word 2010
This tutorial will assume that you already have a document with a picture inside of it, and that you want to be able to wrap your text around that picture to both save space, and make the document more visually appealing. If you have not already inserted the picture, you can click Insert at the top of the window, click Picture, then select your picture. Note that applying text wrapping in Word 2010 can change the layout of some other elements in the document, and effect the overall length of the document. Once you have completed these steps, it is a good idea to proofread the rest of the document to ensure that nothing has been displaced or negatively impacted. Step 1: Open your document in Word 2010. Step 2: Locate the image in the document, then click it once to select it.
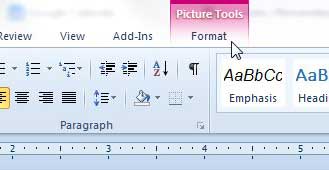
Step 3: Click the Format tab under Picture Tools at the top of the window.
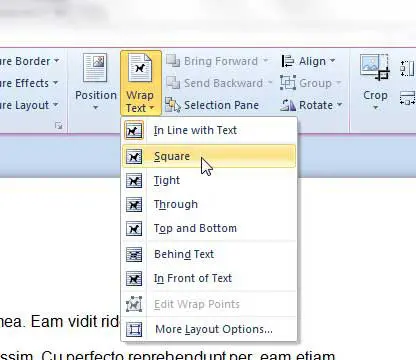
Step 4: Click the Wrap Text button in the Arrange section of the window, then click the style of text-wrapping that you want to use. My preferred method is the Square option, but if you hover on a choice you can see a preview in your document of how the wrapped text will look.
Once you have found the text wrapping option that works best for this picture, you can continue applying text wrapping to the rest of the images in your document. If your picture is taking up the entire width of the document, then there will not be any room for the text to wrap around the image. You can click the image, then drag one of the anchors on the corner to make the image smaller and create space for text to wrap around the image.
Summary – How to use text wrapping in Word 2010
Would you like to add some words to your picture? Learn how to add text to an image in Word 2010 so that you do not need to use an image editing program. After receiving his Bachelor’s and Master’s degrees in Computer Science he spent several years working in IT management for small businesses. However, he now works full time writing content online and creating websites. His main writing topics include iPhones, Microsoft Office, Google Apps, Android, and Photoshop, but he has also written about many other tech topics as well. Read his full bio here.
You may opt out at any time. Read our Privacy Policy