I have been interested in getting a standing desk for a while, after seeing other people use them and talking to people in a similar situation who have seen benefits from incorporating one into their daily life. I chose to get a standing desk workstation from TechOrbits, which seemed like the ideal solution for me, as it’s an inexpensive option with good reviews that wouldn’t require me to get rid of my existing desk, which I like. There are several different types of standing desks, and the pricing for these can range from less than $100 to well into the thousands. The less expensive options are typically the ones that you place on top of an existing desk, while the more expensive options are entire desks that will have some kind of motorized lifting mechanism. I was looking for one on the lower end of that price scale, largely because I didn’t want to make a large investment into something that I wasn’t sure I would like.
Setup
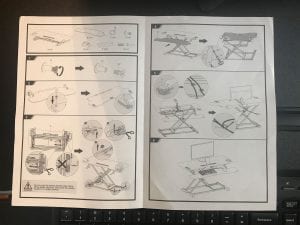
The TechOrbits Rise-X Pro Standing Desk Workstation arrives in a large, thin cardboard box, weighing approximately 42 pounds. Once you open the box up and unpack it you have instructions, a bag with some parts and a screwdriver, plus two large pieces that will be assembled into the desk. Note that you are going to need a pair of scissors to remove some zip ties, but everything else you need is inside the box. You can see the two separate pieces of the desk in the picture below.
The larger piece in the image above is the body of the standing desk workstation. It has legs, a flat surface where you will put your monitor, and the lift assembly that will let you raise and lower the desk. The smaller piece in the image above is the keyboard piece that will be attached to the body. This attachment occurs with four screws, which securely lock the keyboard tray into place. The full assembly of the desk takes just a couple of minutes, and the instructions are pretty straightforward. You can see the instruction booklet, as well as images of the included pieces, in the picture below. Click on the picture for a higher resolution version.
Assembled Workstation
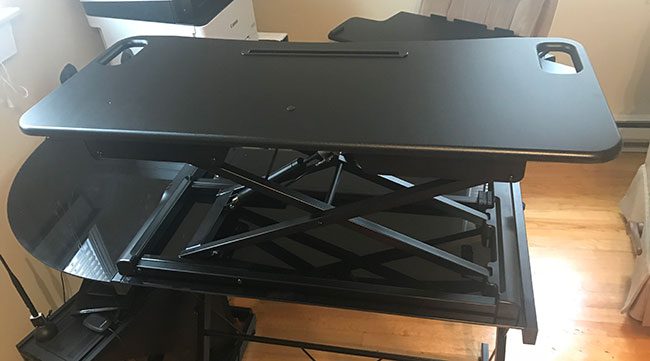
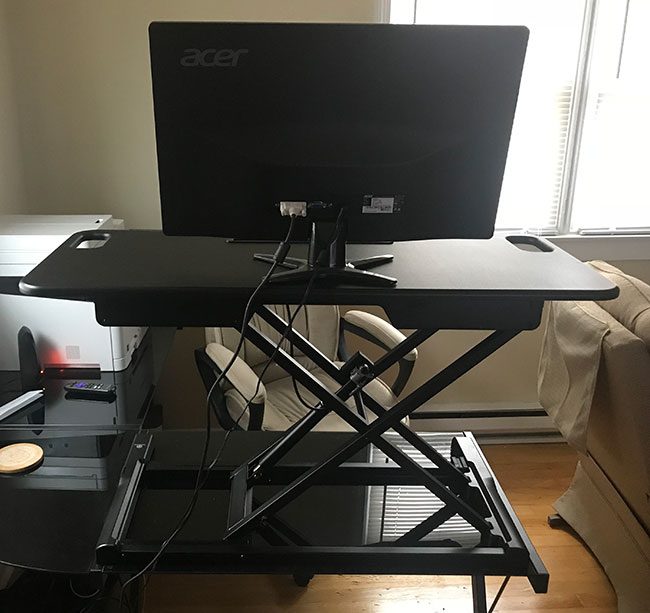
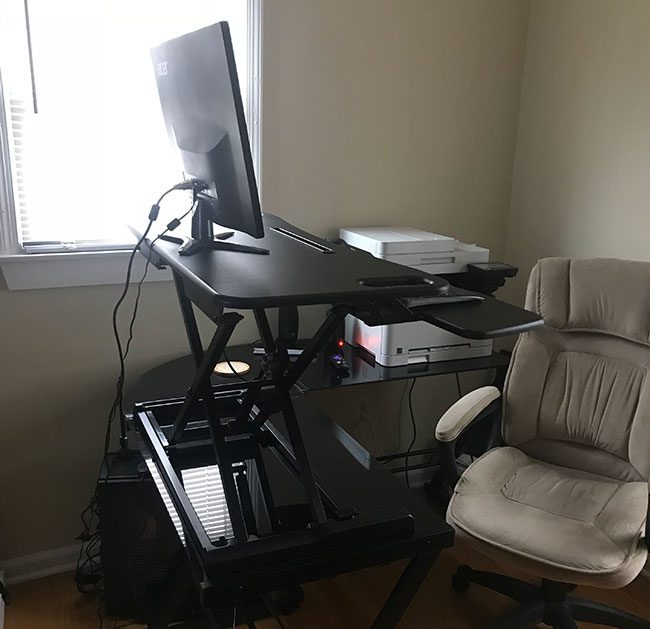
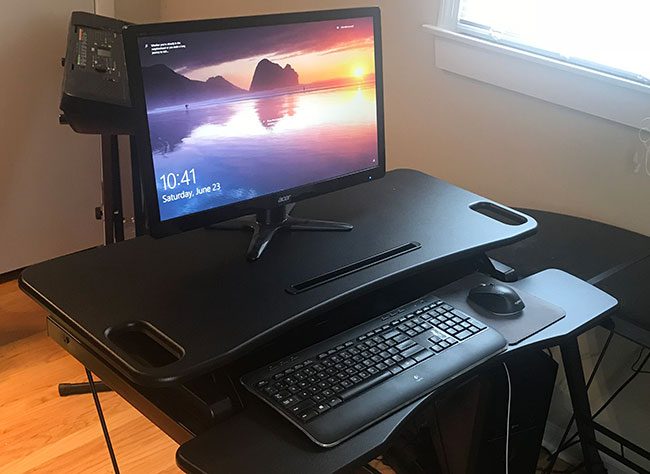
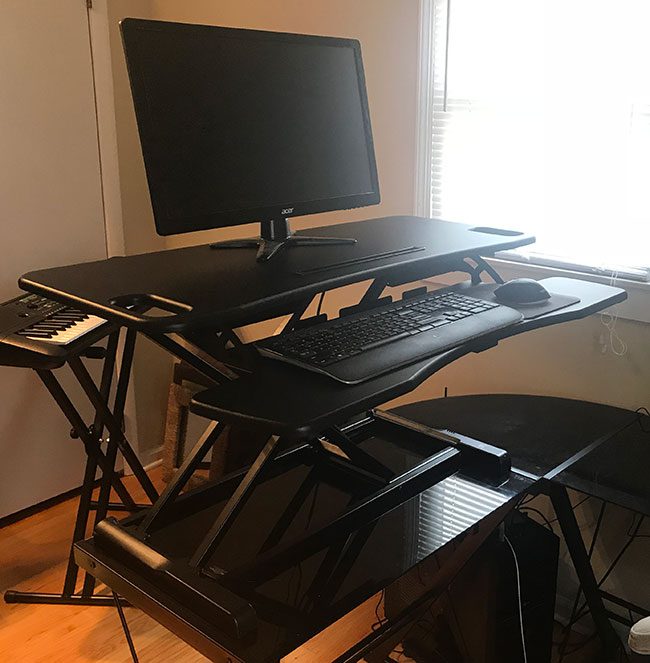
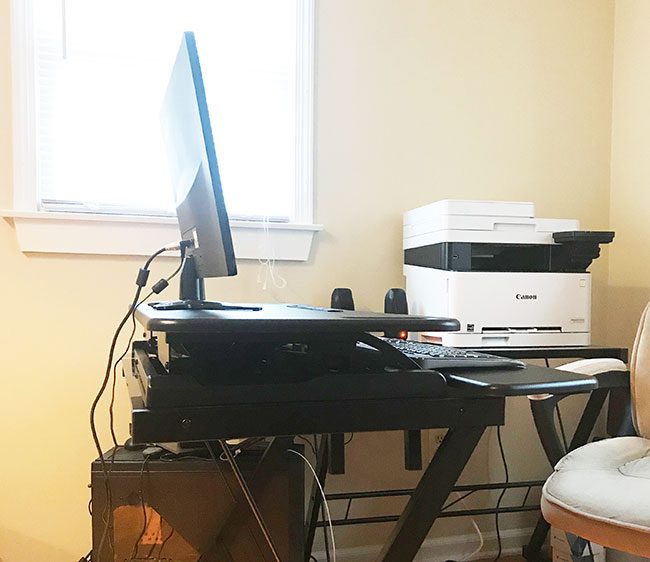
The top part of the standing desk, where you will put your monitor, is shown in the picture above. The pictures below show the desk from the side and back with my monitor, keyboard and mouse on top of it.
Perhaps my biggest concern before I got this desk was how easy it was going to be to switch from the standing position to the sitting position. My intention was to use this in a combination of both positions, so switching needed to be pretty seamless. Fortunately that is the case with the TechOrbits Rise-X Pro Standing Desk Workstation, and is accomplished with a lever that is accessible through a handle on the right side of the unit. You simply grab the lever and let it rise to the standing position, or you grab the lever and push down on the desk to return it to the sitting position. The lever is shown in the picture below.
It requires a very small amount of force to change the height of the desk, and isn’t something that will be a problem for most people. Even with your monitor and computer on the desk providing additional weight, changing the height position is still easy.
The pictures above show the desk with my monitor, keyboard, and mouse. This is how I will be using the desk in most situations, so it provides a real-life glimpse into how the standing desk workstation will fit into your typical work environment. When the desk is in the sitting position, the keyboard is about an inch above the surface of the desk on which I mounted the workstation. It’s a very similar feel to how I used the desk prior to installing the workstation, and I didn’t even need to change the height position of my chair. When you’re ready to stand up you can use the lever mentioned earlier to raise the desk to the desired height. There aren’t any specific height intervals or anything for the desk, so you can raise it to a comfortable height for when you are standing in front of it and working. Since people (and their existing desks) are different heights, this is a great way to ensure that anyone that wants to use this standing desk will be accommodated.
Initial Impressions
I was a little skeptical about whether or not this was something that I was actually going to continue to use after the novelty wore off, but I have definitely decided to keep it after spending a couple of days with the desk. The ability to type while standing is a great addition to my work routine, and the ease with which I can move the desk means that I can change my mind on how I wish to work whenever I want. The movement from the low to high position is very smooth. In fact, you could even have a cup of coffee on the top of the desk that was relatively full, and you wouldn’t spill a drop moving position. (I did this just to test it out, but it’s probably a good idea to keep liquids away from your electronics if you can.) There’s a slot on the front of the workstation that is meant for you to place a phone or a tablet. There are also openings at the bottom of the slot where you could connect a charger so that you can charge the device’s battery while continuing to use it. The slot is a little deep, though, and it actually covers the Home button on my iPhone 7 Plus. I have a case on the phone and can maneuver it a bit so that the Home button is accessible, but the natural fit for the device will have it resting on the bottom of the slot where the Home button is blocked. The height of my monitor was raised about four inches from where it was previously due to the inclusion of the workstation. I actually prefer the new setup, but it is something to be aware of if you are thinking about buying this. Everything that you put on the main section of the workstation will be about four inches higher than it was previously, and the keyboard will be about an inch higher.
Standing Desk Measurements
Below are the measurements for the assembled standing desk. Lowered desk (sitting position) Top part of desk – 4 inches high (relative to the top of the original desk) Bottom part of desk – 1 inch high (relative to the top of the original desk) Raised desk (standing position, maximum height) Top part of desk – 19.25 inches high (relative to the top of the original desk) Bottom part of desk – 16.25 inches high (relative to the top of the original desk) Width Top part of desk – 37.5 inches Bottom part of desk – 37.5 inches (at its widest point)
Final Thoughts
After receiving his Bachelor’s and Master’s degrees in Computer Science he spent several years working in IT management for small businesses. However, he now works full time writing content online and creating websites. His main writing topics include iPhones, Microsoft Office, Google Apps, Android, and Photoshop, but he has also written about many other tech topics as well. Read his full bio here.
You may opt out at any time. Read our Privacy Policy